A little while ago, I had the following conversation over dinner:
Michael, speaking with the same enthusiasm with which he is chewing his dinner (which is a lot, considering it is delicious):
“So I’m trying to decide. Should I write about how to scan on the mac, or something different?”
Everybody at dinner:
“BoooorrriiiiZzzzzz.”
So it’s possible, I suppose, that ‘how to scan on the Mac’ isn’t the most riveting of subjects. But I actually get that question a lot, and here’s why.
Traditionally, in years past, if you got a scanner you would get a CD ROM (Or, if enough years have been past, a floppy diskette) with drivers and a piece of software that would install itself on your computer. You would then use that piece of software to communicate with the scanner and do your scanning for you. The end, everybody lives happily ever after, except that they didn’t because that software tended to be terrible.
Today, though, more often than not the drivers simply ship built-in with the Mac OS. Even if you do go through the install process, no special bit of scanning software gets installed (and if it does, it still tends to be terrible). What gives?
Just as most drivers are now bundled in the Mac OS, standard TWAIN drivers have been built into the system for quite a while. As a result, the capability is built into OS X.
But how do you access it?
There are a variety of ways. You can actually access it from the Print and Scan preference pane in System Preferences, but the most reliable long term solution to learn is as follows:
Go to your Applications Folder. To do that:
Click on the ‘Finder’ in the dock.
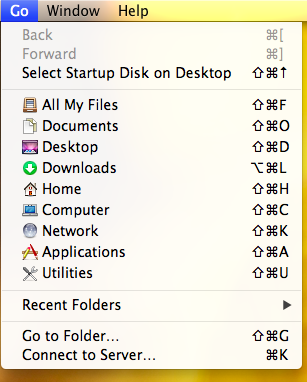
Click on the ‘Go’ menu in the menu bar
Choose ‘Applications’
Find Image Capture in the Applications Folder.
Double click on it to launch it.
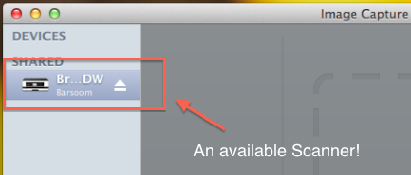
Once it’s launched, you should list any scanner that it can see connected to the computer – or on the network- listed on the left hand side.
Select your scanner, and you will get a friendly looking window letting you scan what you like.
But wait! There’s more! Notice the big fat ‘Show Details’ button.
That’s where the money is – you can adjust things like DPI, whether you are using the document feeder or flatbed scanner, and so on. As a general rule of thumb, if you are scanning for use on the screen, choose 72dpi. If you plan to print it, the minimum you probably want to choose is 300dpi. These are rough guidelines, to be sure, that are affected by whether you are scanning a photo, a document, a receipt, and so on. For example, if you are scanning receipts you definitely don’t need 300dpi, as that will create an overly large file for what will be one of many many many flies. On the flip side, 72dpi probably won’t be enough to produce the kind of detail you want, so 150dpi would be a good compromise.
Further, pay attention to where your scan is being saved to. This is something that people routinely overlook. They then scan the file and go “Wha? What? Where is it”. Well, this tells you:
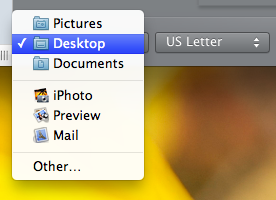
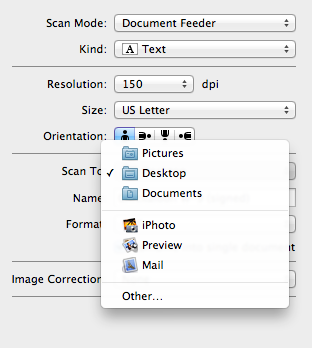
Note that you could save directly to iPhoto if you like. Or the mail application! Woo!
Image Capture can also be quite intelligent. If you are scanning multiple documents or photos, you can tell it to separate them out, so you can put multiple things on the flatbed scanner and they will come in as separate images. This is incredibly useful when you are trying to digitize a group of photos or receipts at once.
Once you are done fine tuning what you want it to do, just click ‘Scan’ and you are off to the races!

