The latter part of the subject could be a lot of things. The first part, too, I suppose, but fewer enough to where we can cover them here!
If you’re an iPhone user, chances are you are, whether unwittingly or not an iCloud user as well. Apple reps at the Apple Store are pretty aggressive about turning it on (Apple ad: used car salesmen everywhere: would you like to push iCloud services instead?) and iOS itself is pretty insistent you get some iCloud on.
It’s not that iCloud is bad – by and large, it’s great, and well worth having for one reason or another. The times when you wouldn’t want iCloud are worthy of an article entirely on their own, but for the moment, lets get over my absurdly long intro and get to the meat: what do you do when you start being incessantly told your iCloud storage is full?
The possible reasons are many, the common reasons are but two.
Reason number 1: one or more of your iDevices backs up to the cloud.
This is a nifty feature that will automatically try and preserve your most important things on the phone to the cloud. As backups go, it beats the pants off of not having a backup at all. Unfortunately, iCloud gives you 5gb of storage by default, and since the backup includes photos you’ve just taken (the ones in your ‘Camera Roll’) you can probably see how you might very quickly shoot that. Particularly since if you have an iPad and an iPhone, they might both be backing up to said storage.
How do you find this out? Cruise on over to the ‘Settings’ app on your iPhone:

From there, tap on ‘iCloud’ and scroll on down to the bottom. The first thing you are likely to see is whether or not you are, indeed, using iCloud for your backup.
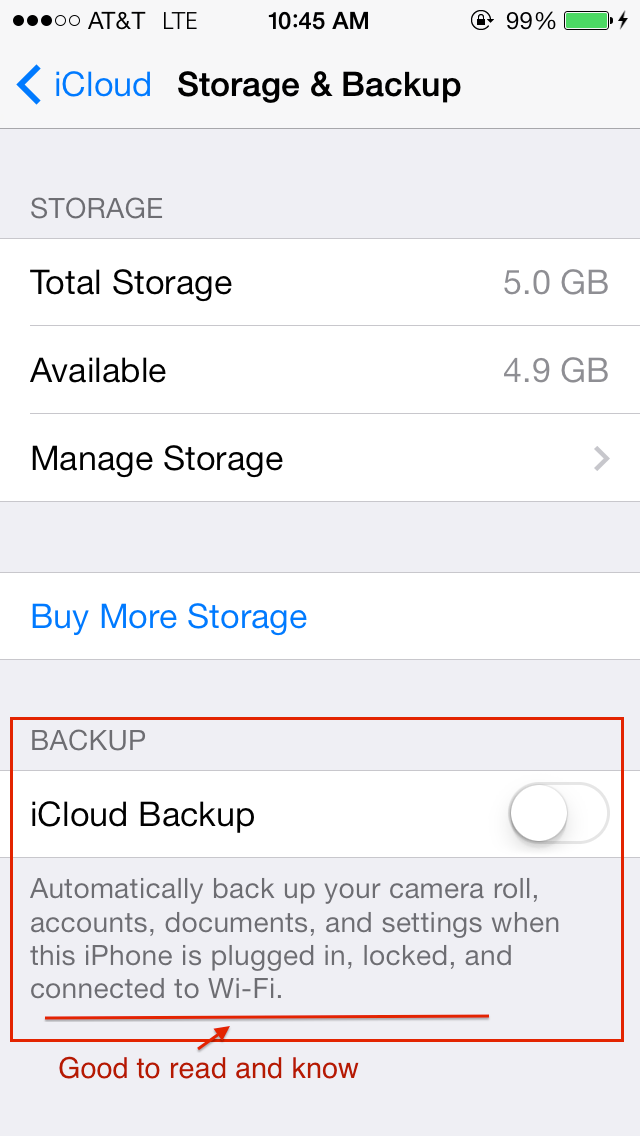
If you are using it, tap on ‘Manage Storage’. This is a handy screen that will inform you just how much of your iCloud storage you’ve used, and even more conveniently for us, exactly for what. Examine this screen with interest. Then, when ready, tap on your device name that’s right under ‘Backups’ at the top. That will bring you to this screen:
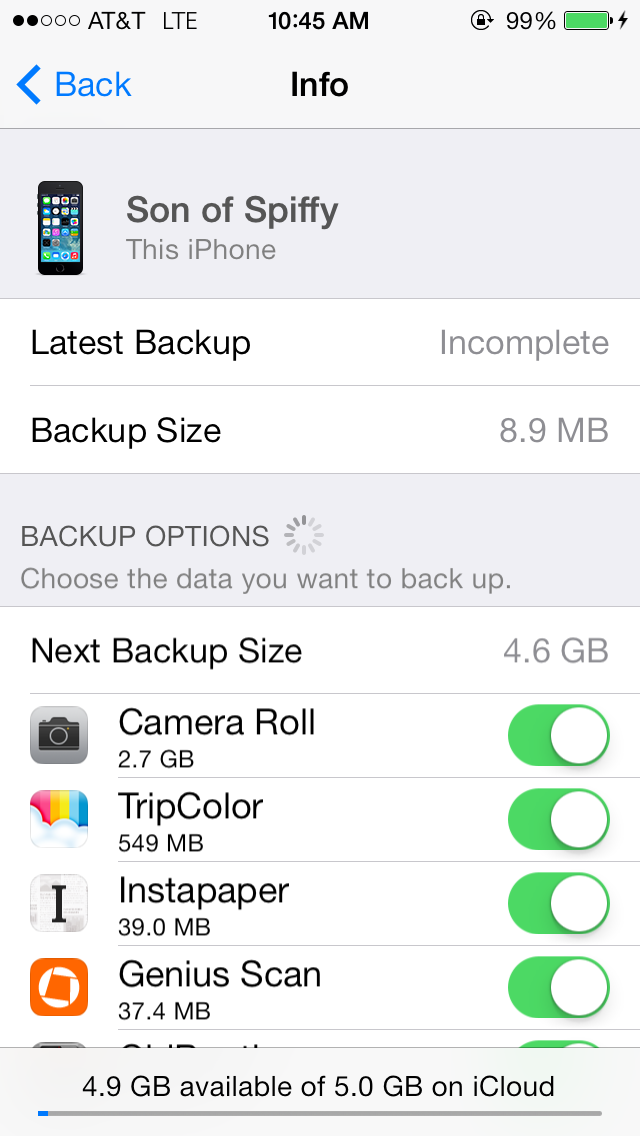
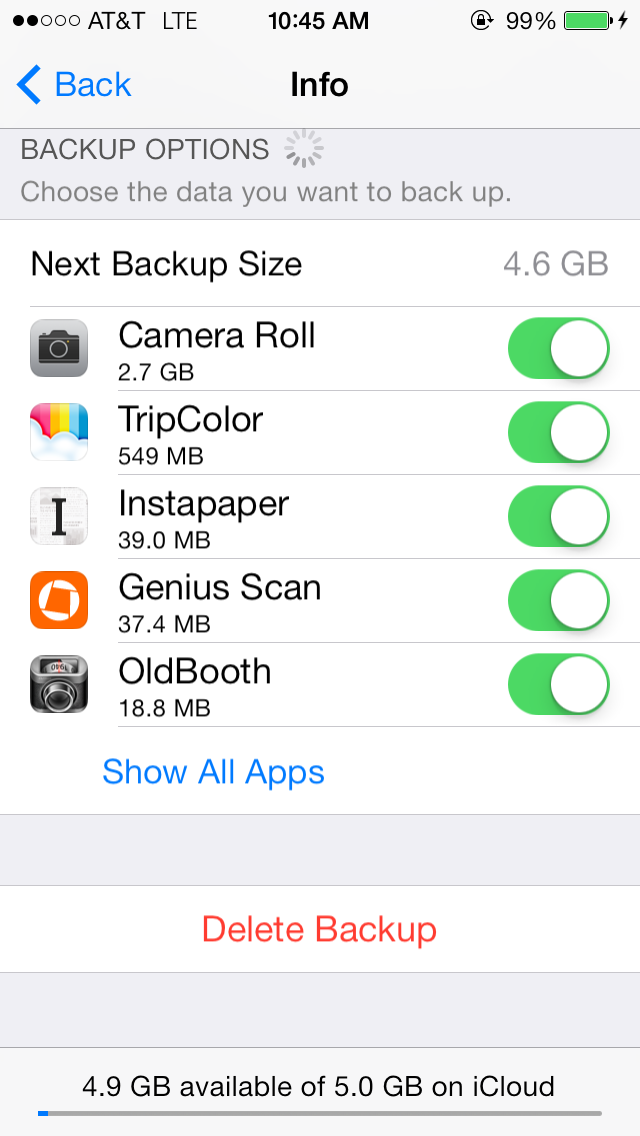
As you can see, this will tell you what specifically is using up space in your backup. From here, you can manage what exactly is backed up as well. Chances are it’s your photos that are gobbling up most of the space.
If this informs you that your backup is, indeed, using up most of your storage space then you have a few options from here:
- Delete your backup and backup to the computer via iTunes instead.
- Turn off the backup option for some of the apps you don’t care about.
- Hook up your iPhone to your computer and import your photos to the computer, deleting the photos from the phone after you are done.
If the masses demand, I can write up exactly how to do those in later articles. For now, I’m going to move on to option #2 that happens and isn’t nearly as obvious.
Reason number two: your iCloud email is eating up all available space.
If you use an @mac.com @me.com or @icloud.com address you are using iCloud storage for your email, something that isn’t widely advertised. And, ever since Apple switched to IMAP email as the default, this means that all of your email is stored in the cloud all the time.
Nifty, except that 5gb of storage for a lifetime of email actually isn’t all that much. So, if it’s your email that is eating up the storage, what do you do?
Well, you can buy more storage from Apple for one thing. But if your pocketbook pinches, then you can also archive that email to your computer like thus:
On a Mac:
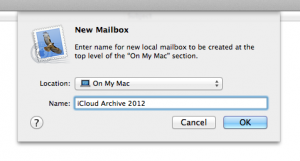
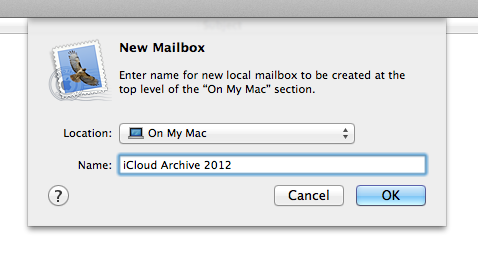
- In Mail.app (assuming that is the email client you use), click Mailbox in the menu bar, then click on New Mailbox.
- Make sure On My Mac is chosen from the pop-up menu, then enter a name for the mailbox. I like to use something that will be descriptive and possible date oriented, like so:
 Select messages in your inbox or another mailbox, then drag them to your new mailbox or choose Message > Move To and choose your new mailbox. I like to arrange all the messages in the inbox by date, and then select a range. Do that by clicking on the ‘date received’ header to arrange the emails by date, clicking the column more than once changes the order of the dates. Then click on the first item in, say, 2012 (for example), and scroll to the bottom until you find the last email of 2o12.
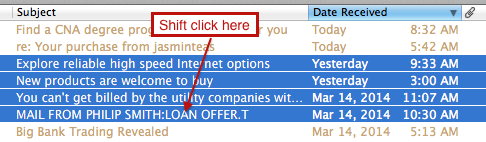
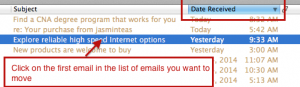 At that point, hold down the shift key and click again. This will select everything between the first click and the shift-click (a super handy trick in general that works on most operating systems in most programs).
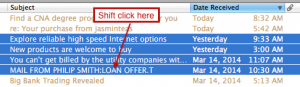 Now, as mentioned before, go ahead and drag them to the archive mailbox you created, or go to the ‘Messages’ menu and choose ‘Move To’.


Keep in mind that if you have a lot of email, this might give you the spinny wheel of death or just take a very very long time. You can view your progress by going to the menu bar and clicking on ‘Window’. From there, choose ‘Activity’. That should give you a small window with a progress bar. If it is taking a while, I’d avoid doing anything else in Mail at that time, since it can get persnickety about large mail transfers.
When it’s done, it will have downloaded all the emails you selected from your iCloud account and placed them on your Mac, keeping them accessible on the Mac but freeing up space in iCloud.
Huzzah!
As always, if you find this helpful, feel free to like us on Facebook or share the article. Or drop a line! Or foist a drink in our honor.