Time Machine is a great and wonderful tool, but only if it’s functioning properly. You know this, because you’ve already set up your Time Machine backup. In a twist of fate, however, you may see (as you go about your daily computer-related business) a notification that you haven’t had a backup in 22 days… Which, considering that Time Machine is supposed to create a backup every hour for the past 24 hours, is concerning. How can you tell if your backup is, in fact, working? Where can you see the latest backup? How can you make sure all of the information you want to save is there?
Not to worry: there are many tools available to check and double check your backup is running properly— and if it’s not, to reconfigure the backup service to be back on its feet.
The first sign that things may not be working properly is that notification. Time Machine is good about letting you know how recently your last backup was. If you are using a laptop and on the move a lot, you may not be able to perform backups except when you are at home. Each time you log in (if you are running Yosemite or Mavericks), you should see a notification from Time Machine detailing how long it’s been since your last backup. We get a lot of notifications on our phones and computers, and so it becomes fairly easy to ignore these. This is not a great idea in this case! If you can get the hardware plugged in and perform a backup, please do it! It will make your life (and mine) so much easier on the day when the inevitable hardware/software/otherware failure occurs, and suddenly you realize how much you love all that data you’ve let go for the past 22 days.
But perhaps you have not ignored your notification, and in fact you have tried to perform a backup– and yet things don’t seem to be going well! Maybe you get an alert that says there was a failure, or maybe the notifications STILL insist you haven’t had a backup in 23 days now, or maybe you just have a sinking feeling about all of this, as the apocalypse is nigh, and you wouldn’t want to get caught without a hard drive chock-full of the appropriate data tucked safely away for future generations to ponder over, if humanity makes it.
How can you check?
First of all, there are a few different options for performing a Time Machine backup, but the most common is to use an external hard drive (which I will also call a “disk” or just “drive”) plugged directly into your computer, either through a USB, Thunderbolt, or Firewire cable. We are going to assume that the direct connection is your scenario: if not, please refer here for more information about connecting to a Time Machine backup through Time Capsule, the most common method of wireless backup in conjunction with Time Machine. (Although some of these checks will work just as well with a wireless Time Machine connection, so feel free to read on…)
Perhaps you, like me, have not yet sprung for a Time Capsule setup, probably because you don’t need it, and so, here you are, hoping the external hard drive you’ve plugged into your computer is, indeed, receiving the backup information Time Machine is slotted to give it. Let’s find out if it is!
First things first: make sure you are actually plugged in. Physical connection between your cable and its dock?


Next, check to see if the disk is showing up on your computer. One easy way to verify this is to navigate to your finder (the little blue and white guy in the dock, hopefully wearing a smile). Now, in the menu bar at the top of your screen, click “Go” and from the drop down, select “Computer”.
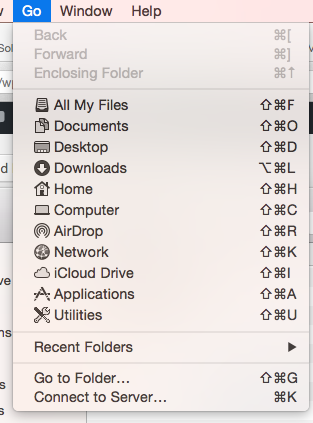
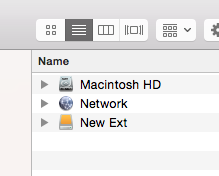
This should bring up a window where you can see your own internal hard drive, any associated networks, and hopefully the disk where your Time Machine backup is supposed to live.
If you don’t see the disk there, you may have other issues. Does the external hard drive need to be plugged into an electrical outlet? (Portable ones shouldn’t, desktop ones do.) Does it need to be physically switched on? If you have have covered all of these bases, and still don’t see your external drive in the list, time to refer to our (upcoming) post about how to use Disk Utility to check your hard drive’s health.
But, you happily DO see your disk there: in this case, mine is called “New Ext.”
So let’s make sure Time Machine is actually doing its job.
The very first place you want to look is in the Time Machine menu bar– it’s at the very top of your screen, in the cluster of icons on the right. It looks like this:
![]()
Once you click this icon, you’ll see a menu that looks like this:
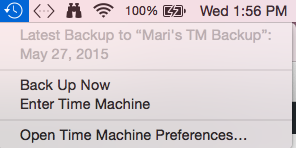
From here we see some information, some options, and we can navigate to the Time Machine preferences pane, which will shortly tell us even more.
One of the most important pieces of information is right at the top: the last time I performed a backup on my laptop was May 27th. Considering it is today July 1st, I am egregiously behind on performing backups, and should consider finding a guide to help me make sure there is nothing wrong with my Time Machine backup setup.
You can see that I can opt to “Back Up Now”… that may solve your problem for the time being, but we want to make sure backups are ongoing, not just happening currently. You can also “Enter Time Machine,” which we’ll get to in a minute.
But wait!
What if I don’t HAVE that icon on the menu bar?
Not to worry… This is also amendable. There’s another way to get to Time Machine preferences, and from there we’ll make sure that icon is always in the menu bar for easy access, as well as address the other issues at hand.
Click on the Apple icon at the top left hand side of your screen, and from the menu select “System Preferences.” Here you’ll see a selection of icons, including one for Time Machine. Open this icon and you’ll see the same preference pane as if you had clicked “Open Time Machine Preferences” from the menu bar.
When looking at this preference pane, make sure:
- The on/off toggle is switched to “on.”
- Your chosen backup location shows up in the list of disks.
- The checkbox next to “Show Time Machine in Menu Bar” is checked (this makes sure that icon appears up top for easy access!).
- There are no errors next to the icon of your hard drive, or that pop up when you open the preference pane.
Here’s what mine looks like:
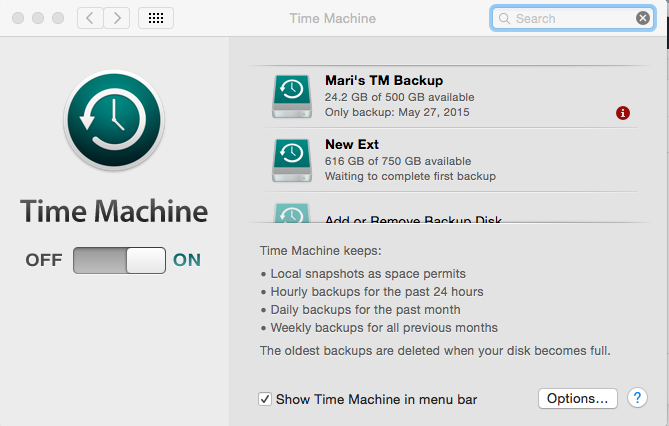
I have two disks I’m using for backup (I’ll show you why in a moment). You can see that one of them (Mari’s TM Backup) has a red “i” next to it, and that it hasn’t been backed up for over a month. If I click the red “i” i find out that
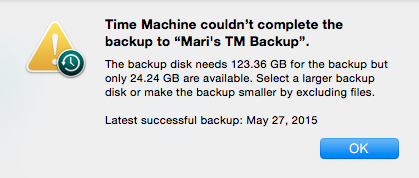
Ah ha! Well, size can certainly be a source of many problems. I had enough room on my external drive to perform one backup, but after that, there wasn’t enough room. One solution would be to get a different, larger drive to use for a backup. My computer’s internal hard drive is 750 gigs, and although I’m only using about 500 right now, it was probably foolish of me to think I could get a backup drive to function properly if it was going to be this close to full. So, the second drive (New Ext) I have connected is a 750 GB drive, and should do the trick (which is why it’s there).
**Even if you do start backing up to a second drive, or especially switch drives altogether, I’d advise waiting before making any bold erasures on your first backup drive. In my case, I do still have a complete backup from a month ago– if the world falls apart, I can still go back to that backup and have SOMETHING to draw upon to retrieve important data. JUST KEEP IT for a little while anyway.
If you click “Options,” you’ll notice that there is a checkbox next to “Back up while on battery power,” if you have a laptop. This probably isn’t checked (because backups can take a while, and you don’t want to rely on your battery to work the whole way through), and if it isn’t– plug your computer into the wall! Your backup won’t happen until you do!
If everything looks good in the Time Machine preferences pane, go ahead and close that window and return to the icon at the top of your screen. From here, select “Back Up Now.” Now, if you click the icon again, you’ll see that the status of your Time Machine is “preparing your backup.” Soon you should be able to see that it is “Backing Up: x GB of x GB.” This is good! Open Time Machine preferences one more time and you should see a progress bar next to the icon of your hard drive that also lists how many gigs it has gotten through. The backup can run in the background of your work. If it’s the first time, or even the first time in a long time, it might take a while. If you have a laptop, make sure it’s connected to power, and leave the lid open if you have to step away, or if you want to let it run overnight.
Finally, after your backup is done, you might feel the need to check and make sure the things you wanted backed up (everything, unless you did the exclusion thing we don’t recommend) were indeed backed up. How can you check?
From the menu bar icon at the top of your screen, select “Enter Time Machine.”
This is going to take you into a bizarre-looking vortex where you see many layers of finder windows.
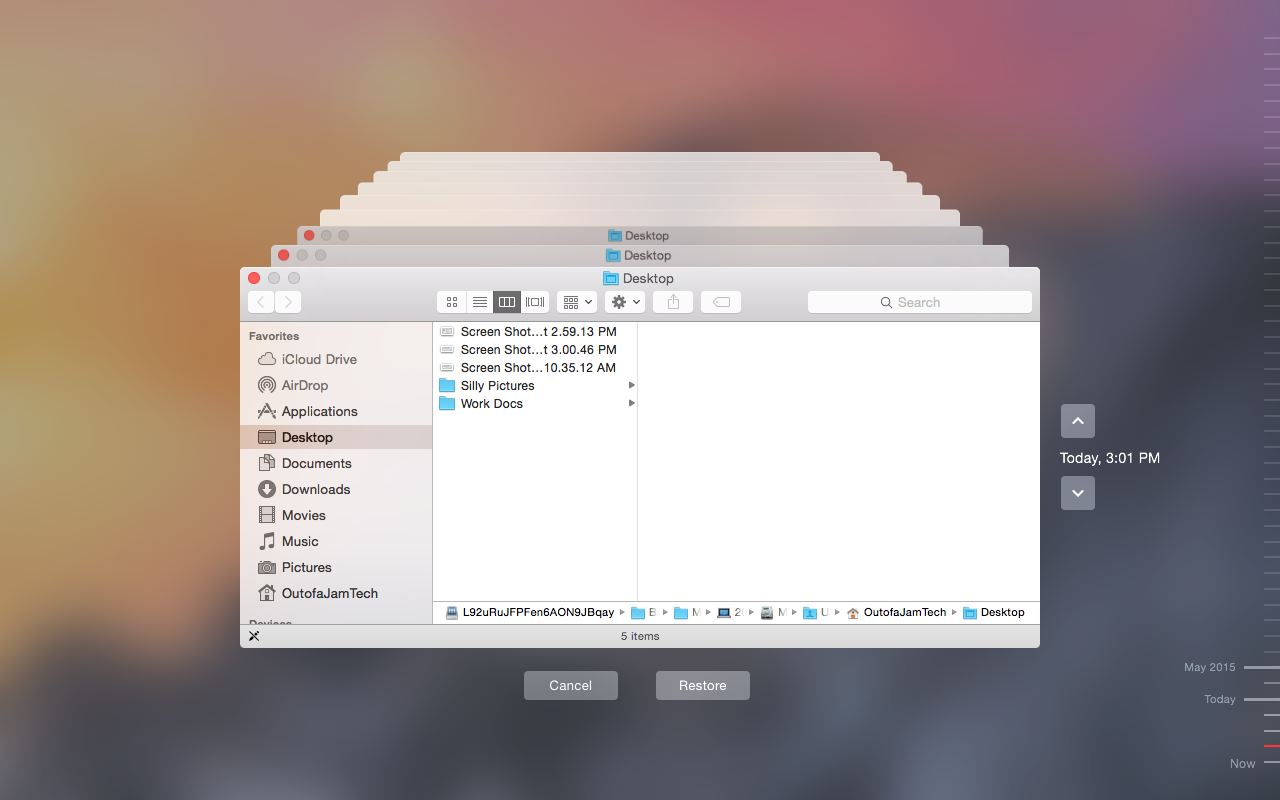
The further back the layer, the further back in time. You’ll see to the right of the window a timestamp– hopefully every hour from the last 24 hours, and then each day as you go further back. If this isn’t the case your backups probably weren’t happening as designed, most likely because:
- Your external drive wasn’t plugged in
- Your computer wasn’t plugged in
- Time Machine was off
- Your external drive was too small
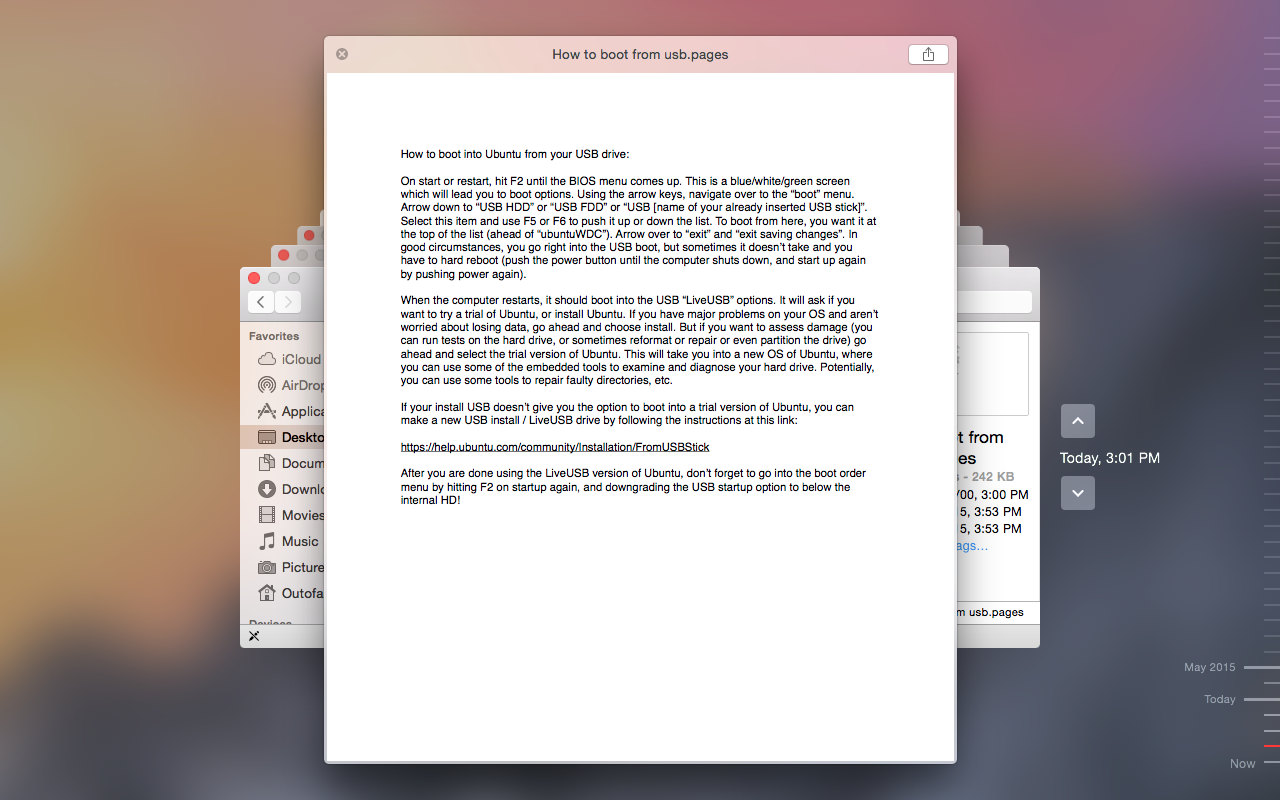
But since we’ve solved all of these problems, we should start seeing more backups over the next few days! Or, if backups do seem to have been happening as scheduled, you can navigate back in time to check the viability of a given document or file. Use the arrows to the right of the window to find the time or day you want to investigate. Then use the window to navigate to the document you want to check out. Time Machine conveniently lets you preview whatever file you are after- and you can see if it has been saved correctly.
If you are satisfied your Time Machine backup is working as it should be, you can go on to learn more about how to restore files from the backup or how to recover your entire system if need be.
Thanks for your information. I am a n0vice user of the Airport Time Capsule. Based on your feedback my device appears to be functioning. My only question is that when I select Enter Time Machine, I see my Desktop screen only. Does this mean that I am only backing up my Desktop and not the entire Hard Drive? Appreciate any feedback you may have.
Hi Scott!
Sorry for the late reply, and great question. Time Machine, when you click ‘enter’ will show you the backups of the window you are viewing. So, if you are on the desktop, it will show you the timeline of the desktop, if you are in the Mail application, it will show you the backups of Mail (this latter one is super handy). Simply navigate to another window somewhere, choose to enter Time Machine, and you should see all your backups for that spot!