
Dropbox for File Provider
Dropbox has rolled out an update for macOS that changes how it interacts with files, and subsequently how and where you see your files. This update enables “Dropbox for File Provider.” File Provider in macOS is “An extension other apps use to access files and folders managed by your app and synced with a remote storage.” (Apple Developer Documentation: File Provider.)
Say what???
This is just an improved way for applications like Dropbox to let you access (eg, open and use) your files and documents, especially the “online-only” ones. It increases security in this interaction, and provides some new abilities. There are trade-offs and changes that will happen, so you will need to know what to expect.
Should you update to this now? Generally, yes. There are some exceptions, as always, but for the most part, especially if you are an organization or business, this update will allow you to do things like synchronistic editing in Word or other documents, using fuller context menus (like choosing to “Open with” a specific app vs in the browser), and it will be less clunky about hogging space or thinking it’s hogging space on your Mac. And of course, most importantly, the update increases security.
As you prepare for this update, review the full list of changes to expect here. Dropbox is updating this list as it rolls out features and addresses issues.
You may also want to look at the changes in sync icons, at the Dropbox article here. The idea of the icons is similar enough that it shouldn’t cause too much confusion, but their key is useful in case confusion occurs.
How to update
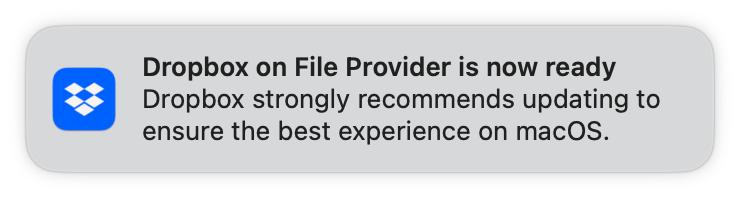
If you are on macOS 12.5 or higher, it’s likely you’ve seen a notification banner from Dropbox, showing your eligibility for the update.
You may also see a notification in the Dropbox dropdown in the top menu bar that lets you know the update is ready and provides a link to start the process.
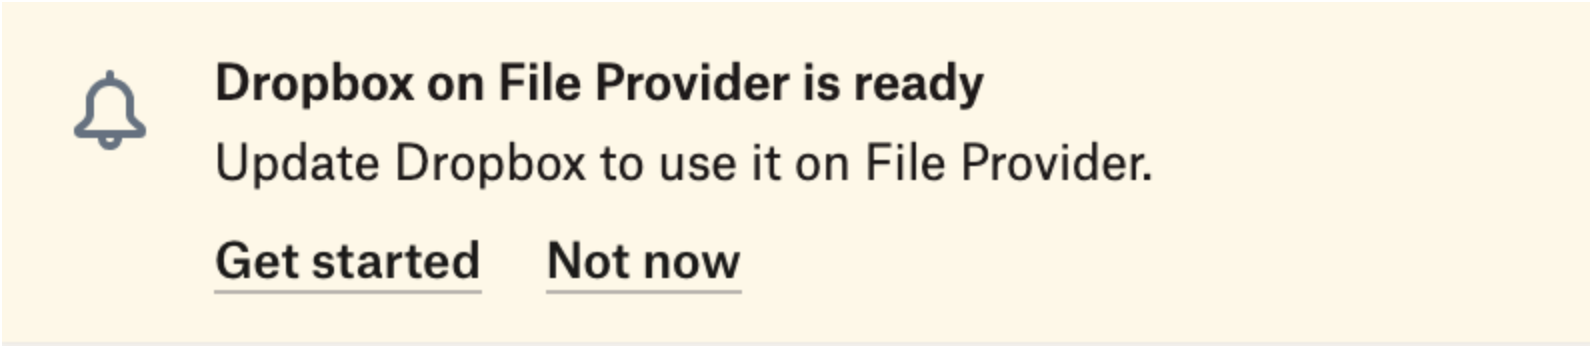
Click the provided link to begin!
Sometimes, you don’t have time to run an update. That’s okay! If you’ve dismissed the notifications, you can still run this update on your own time.
Prompting an update manually
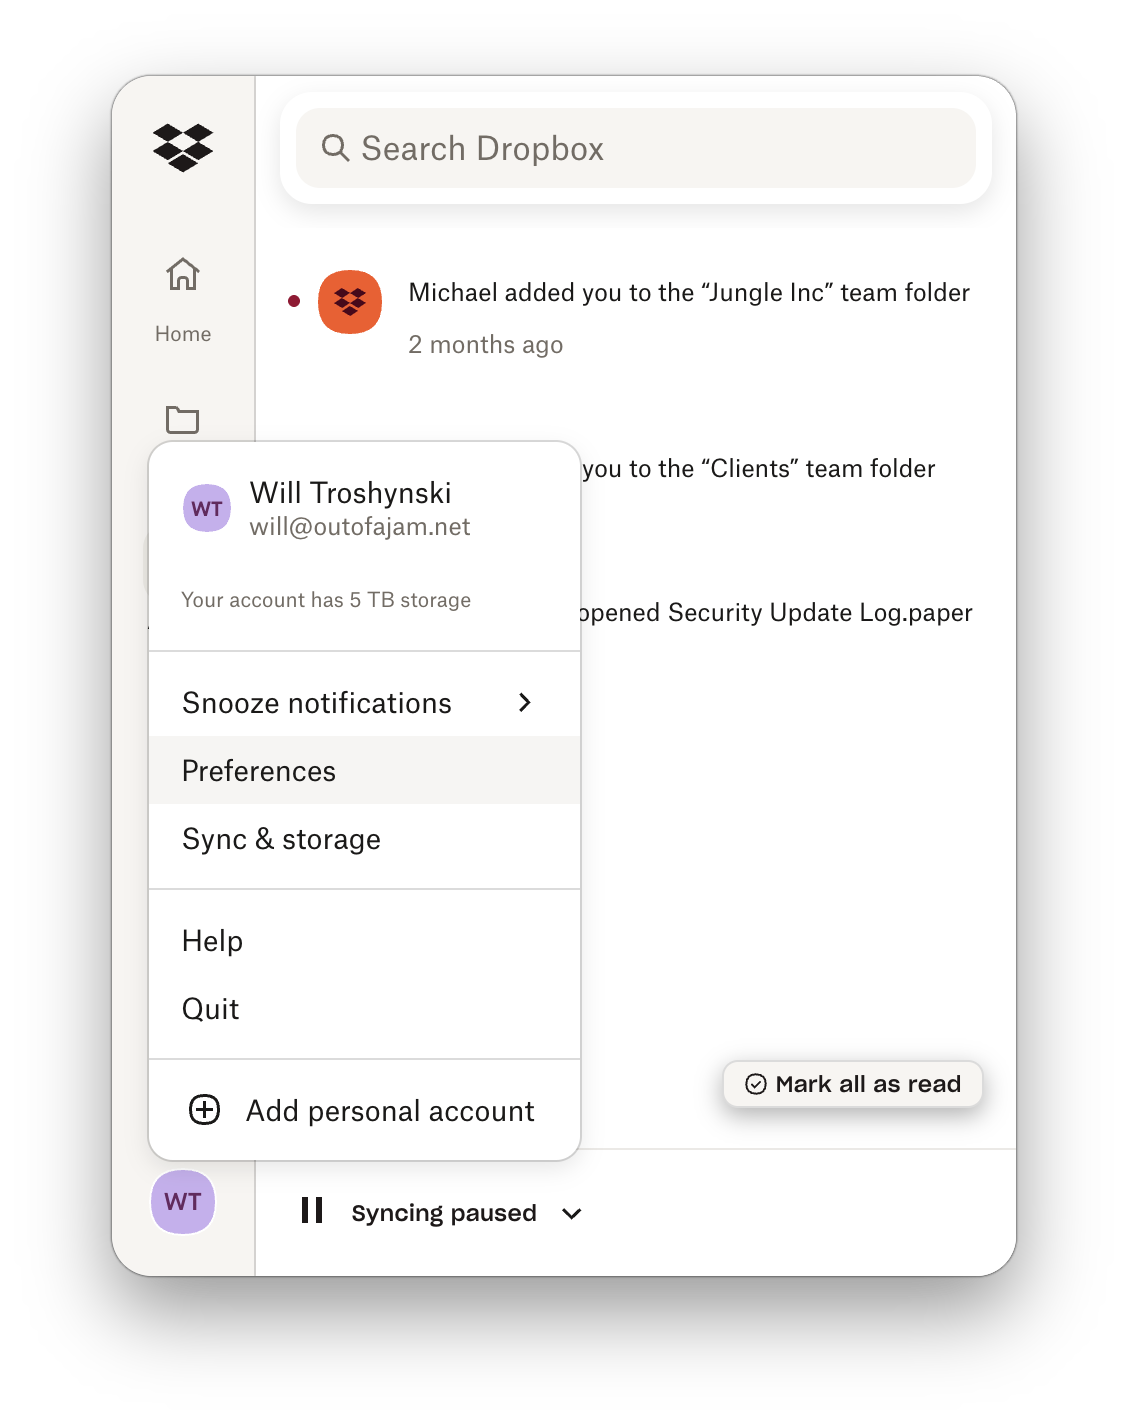
- Click the Dropbox icon in the top right of your screen
- Click your initials in the bottom corner
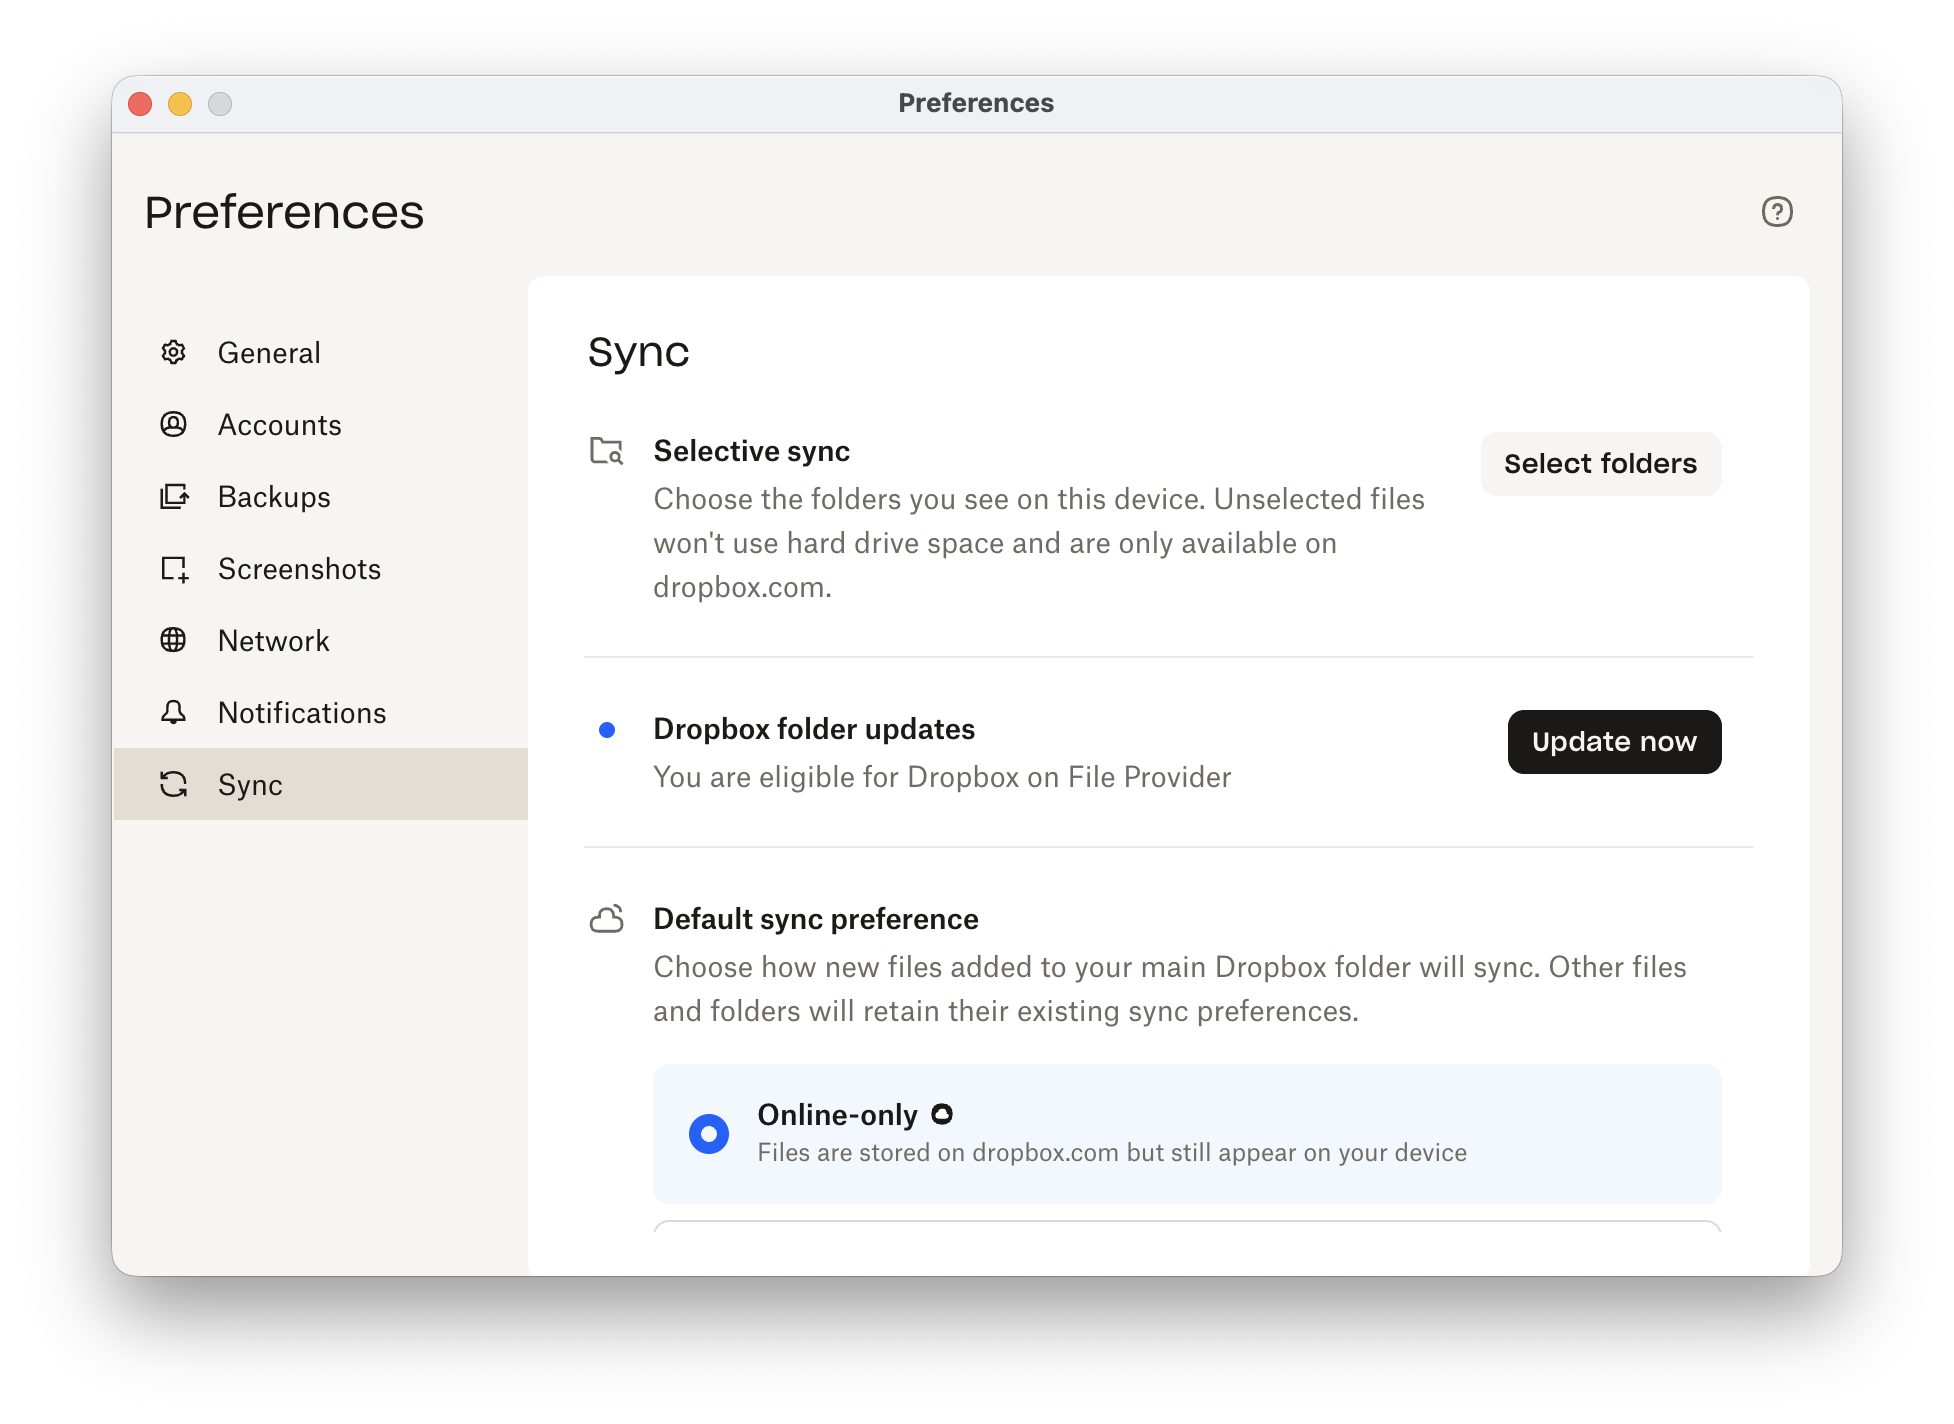
- Choose “Preferences”
- Navigate to “Sync”
- If you are eligible, you’ll see, “You are eligible for Dropbox on File Provider” with an update button to the right (if you are not eligible, reach out to your administrator)
- Click “Update now” to begin!
Doing the update
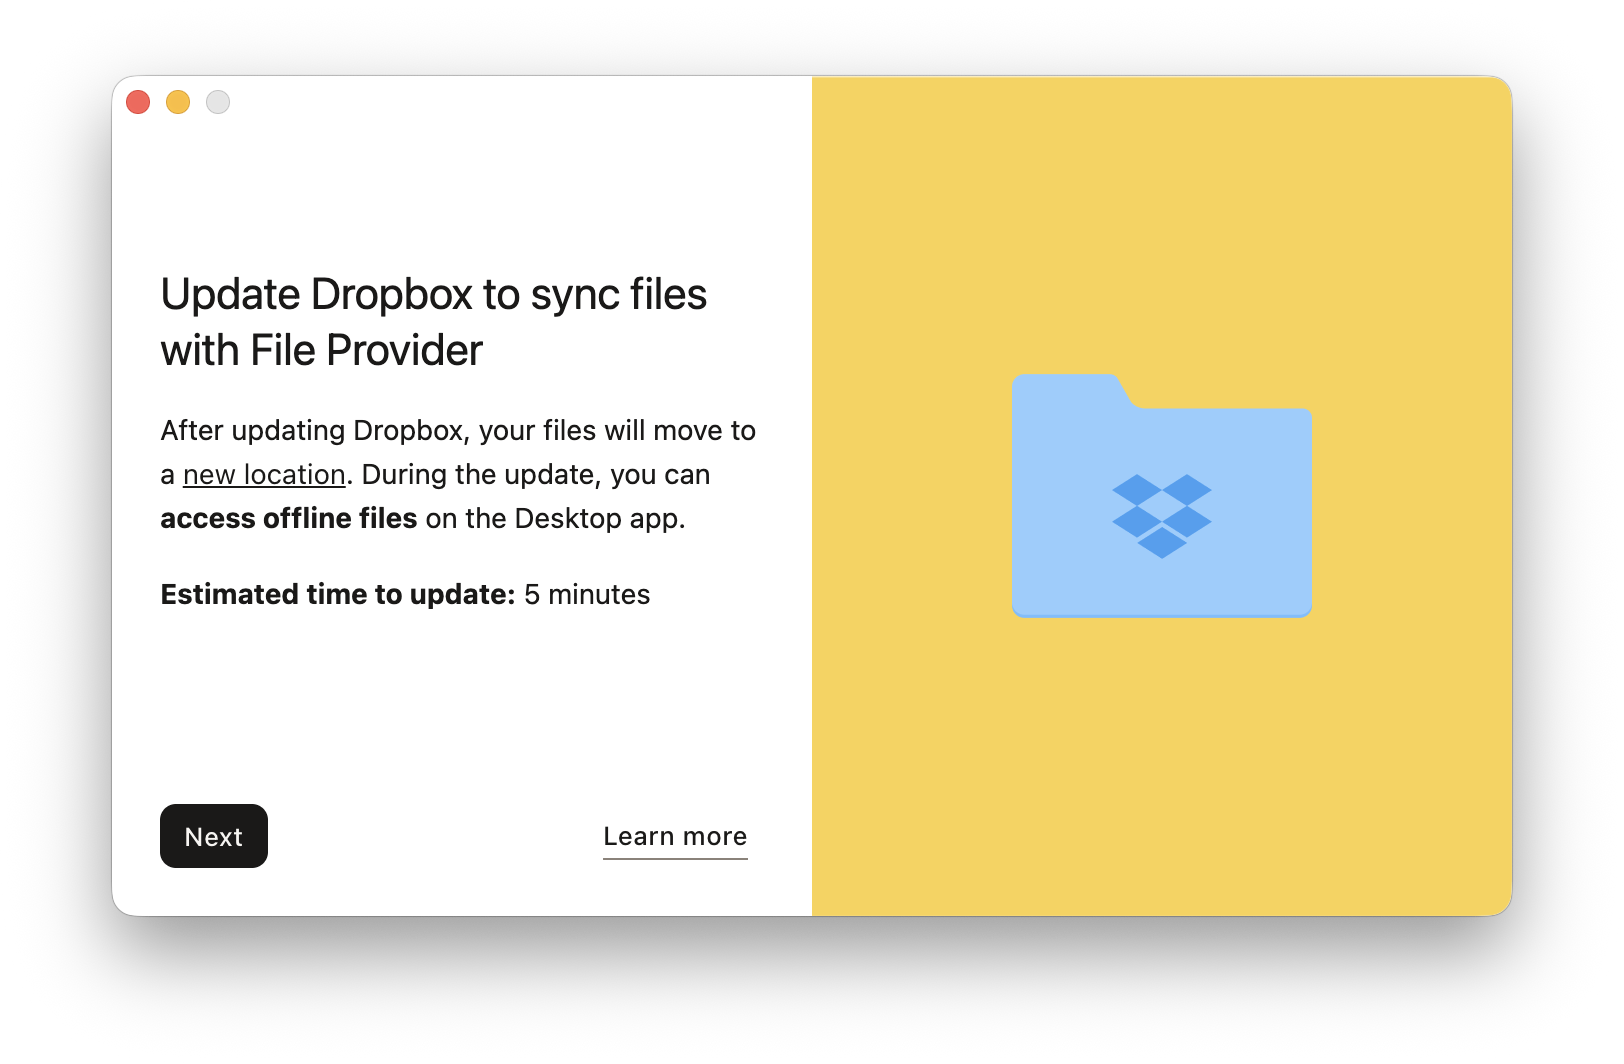
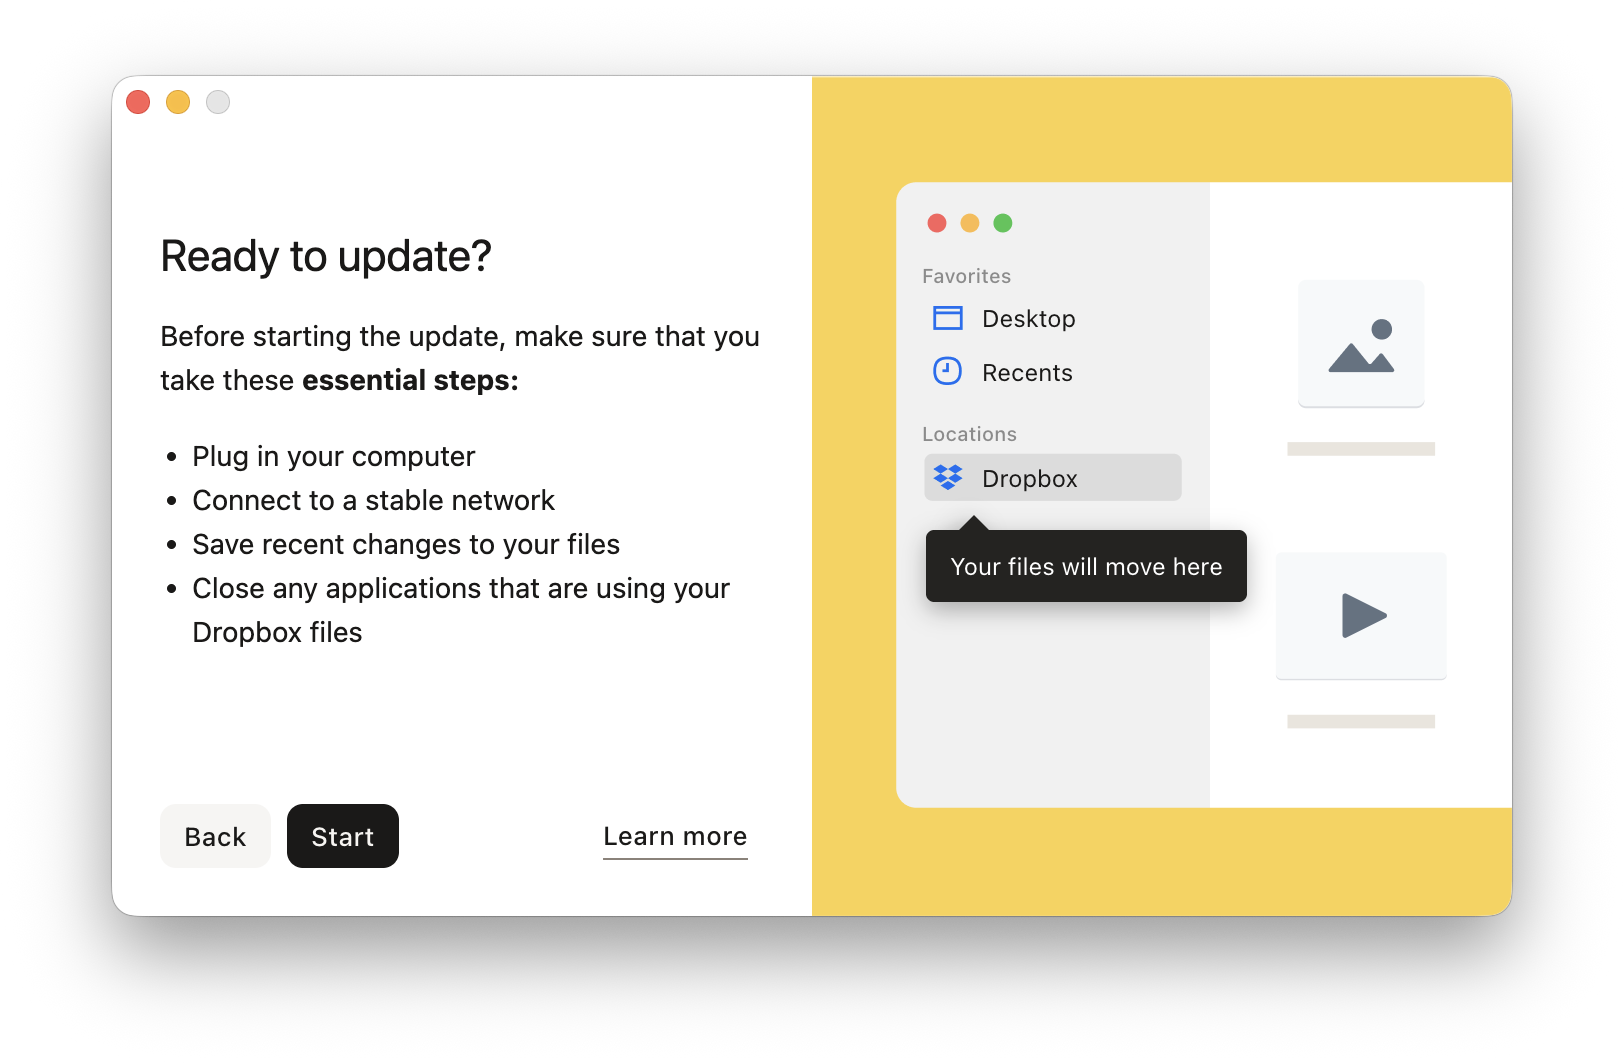
Dropbox will walk you through the update steps. It provides you some handy links to learn all about the process along the way.
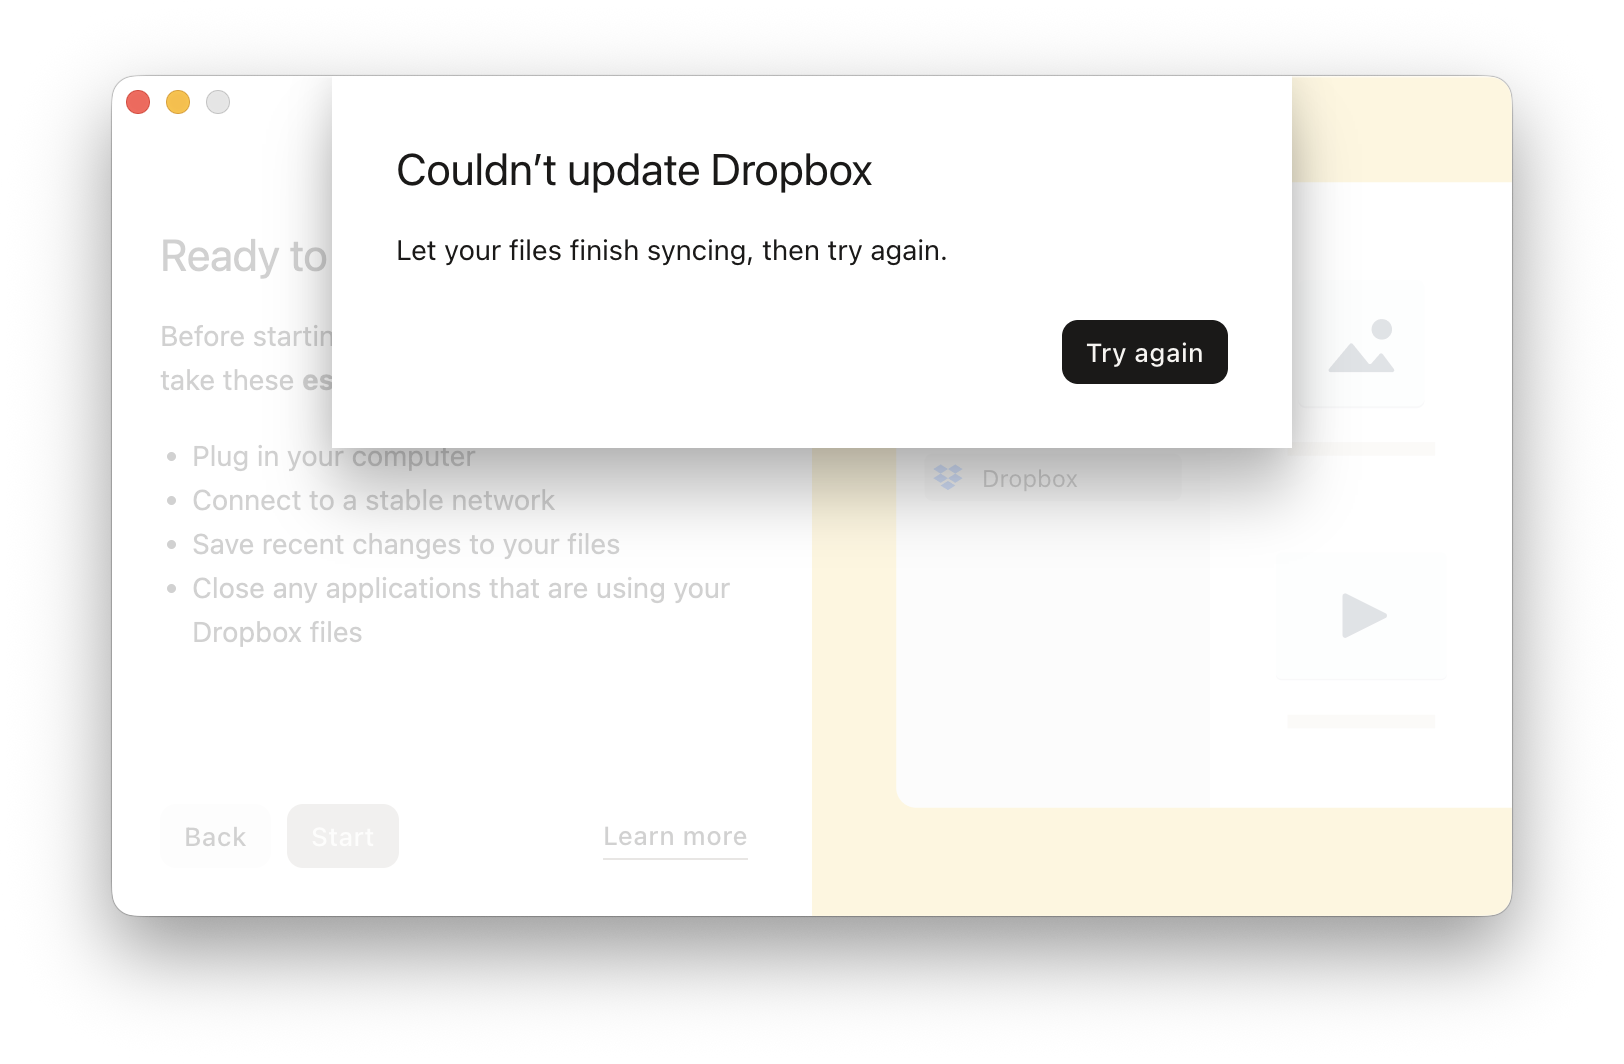
If Dropbox is syncing, or if you’ve paused syncing, you’ll get an error to allow syncing to complete before running the update. You can click the Dropbox icon in the top bar and resume syncing, if needed, without closing the warning or the update window. Once syncing is done, choose “Try again.”
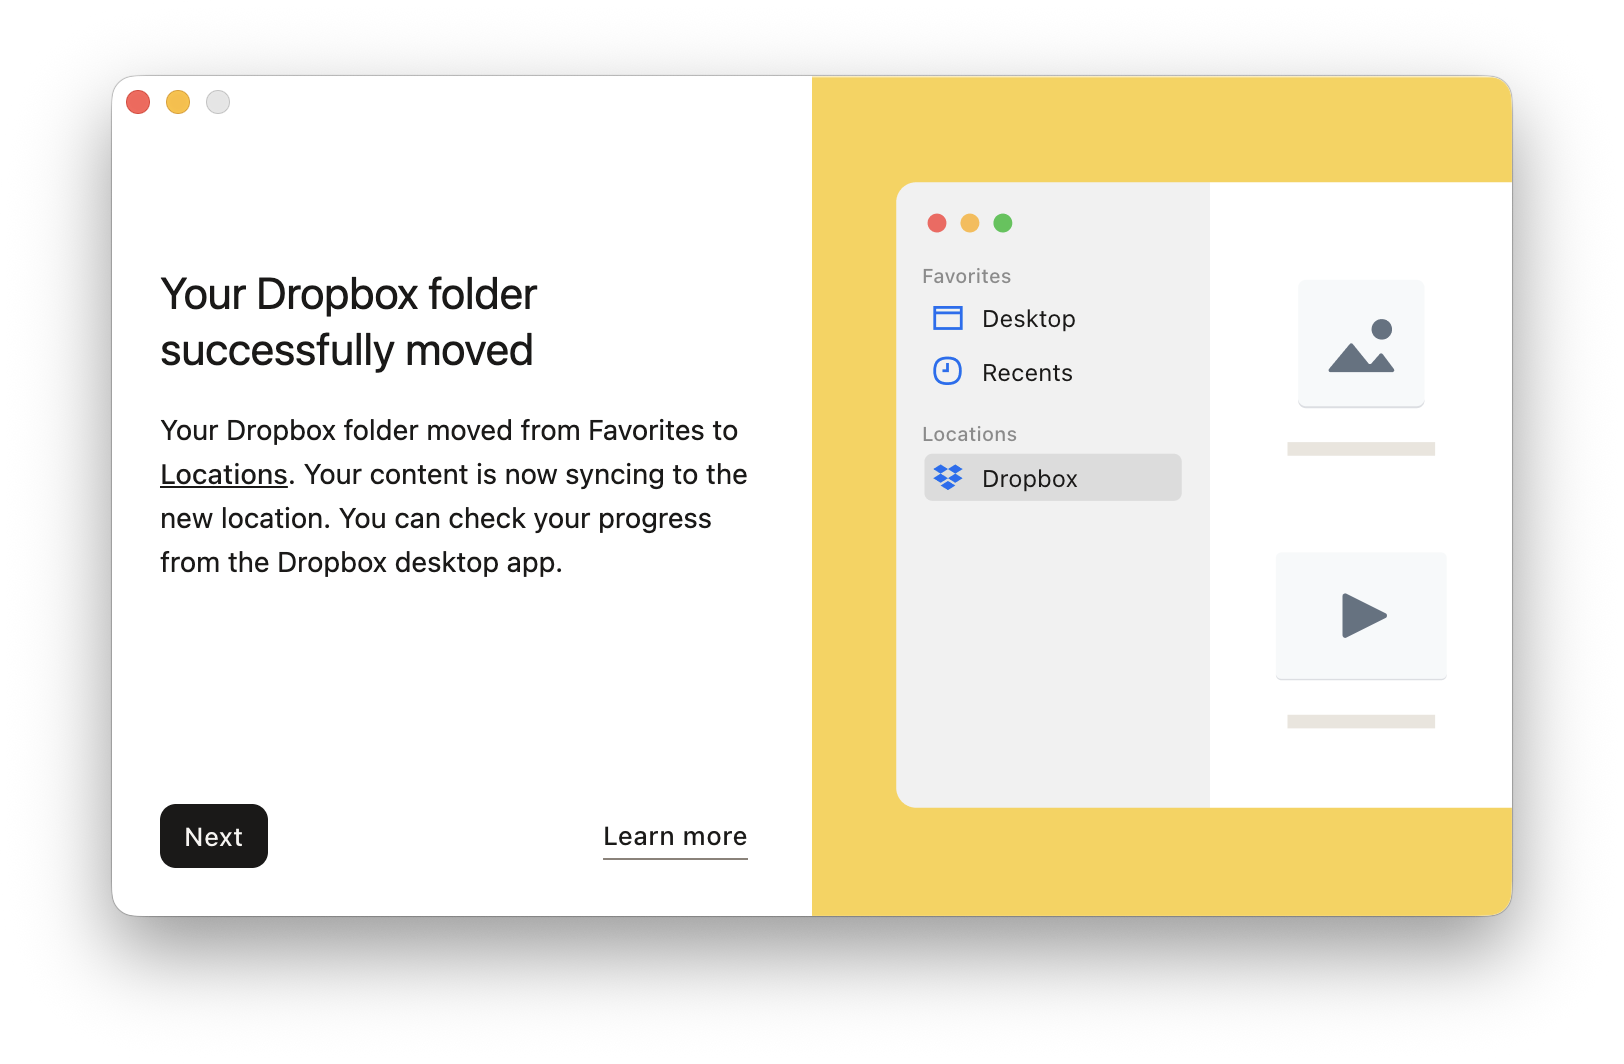
Dropbox will quit (aka, disappear from the top menu bar). You may see a screen similar to the other steps that says “Update in progress.” Once the update is complete, you’ll see a final couple of screens letting you know the process is done, and providing a few more links for guidance.
Cleaning up (and making sure you can see your files!)
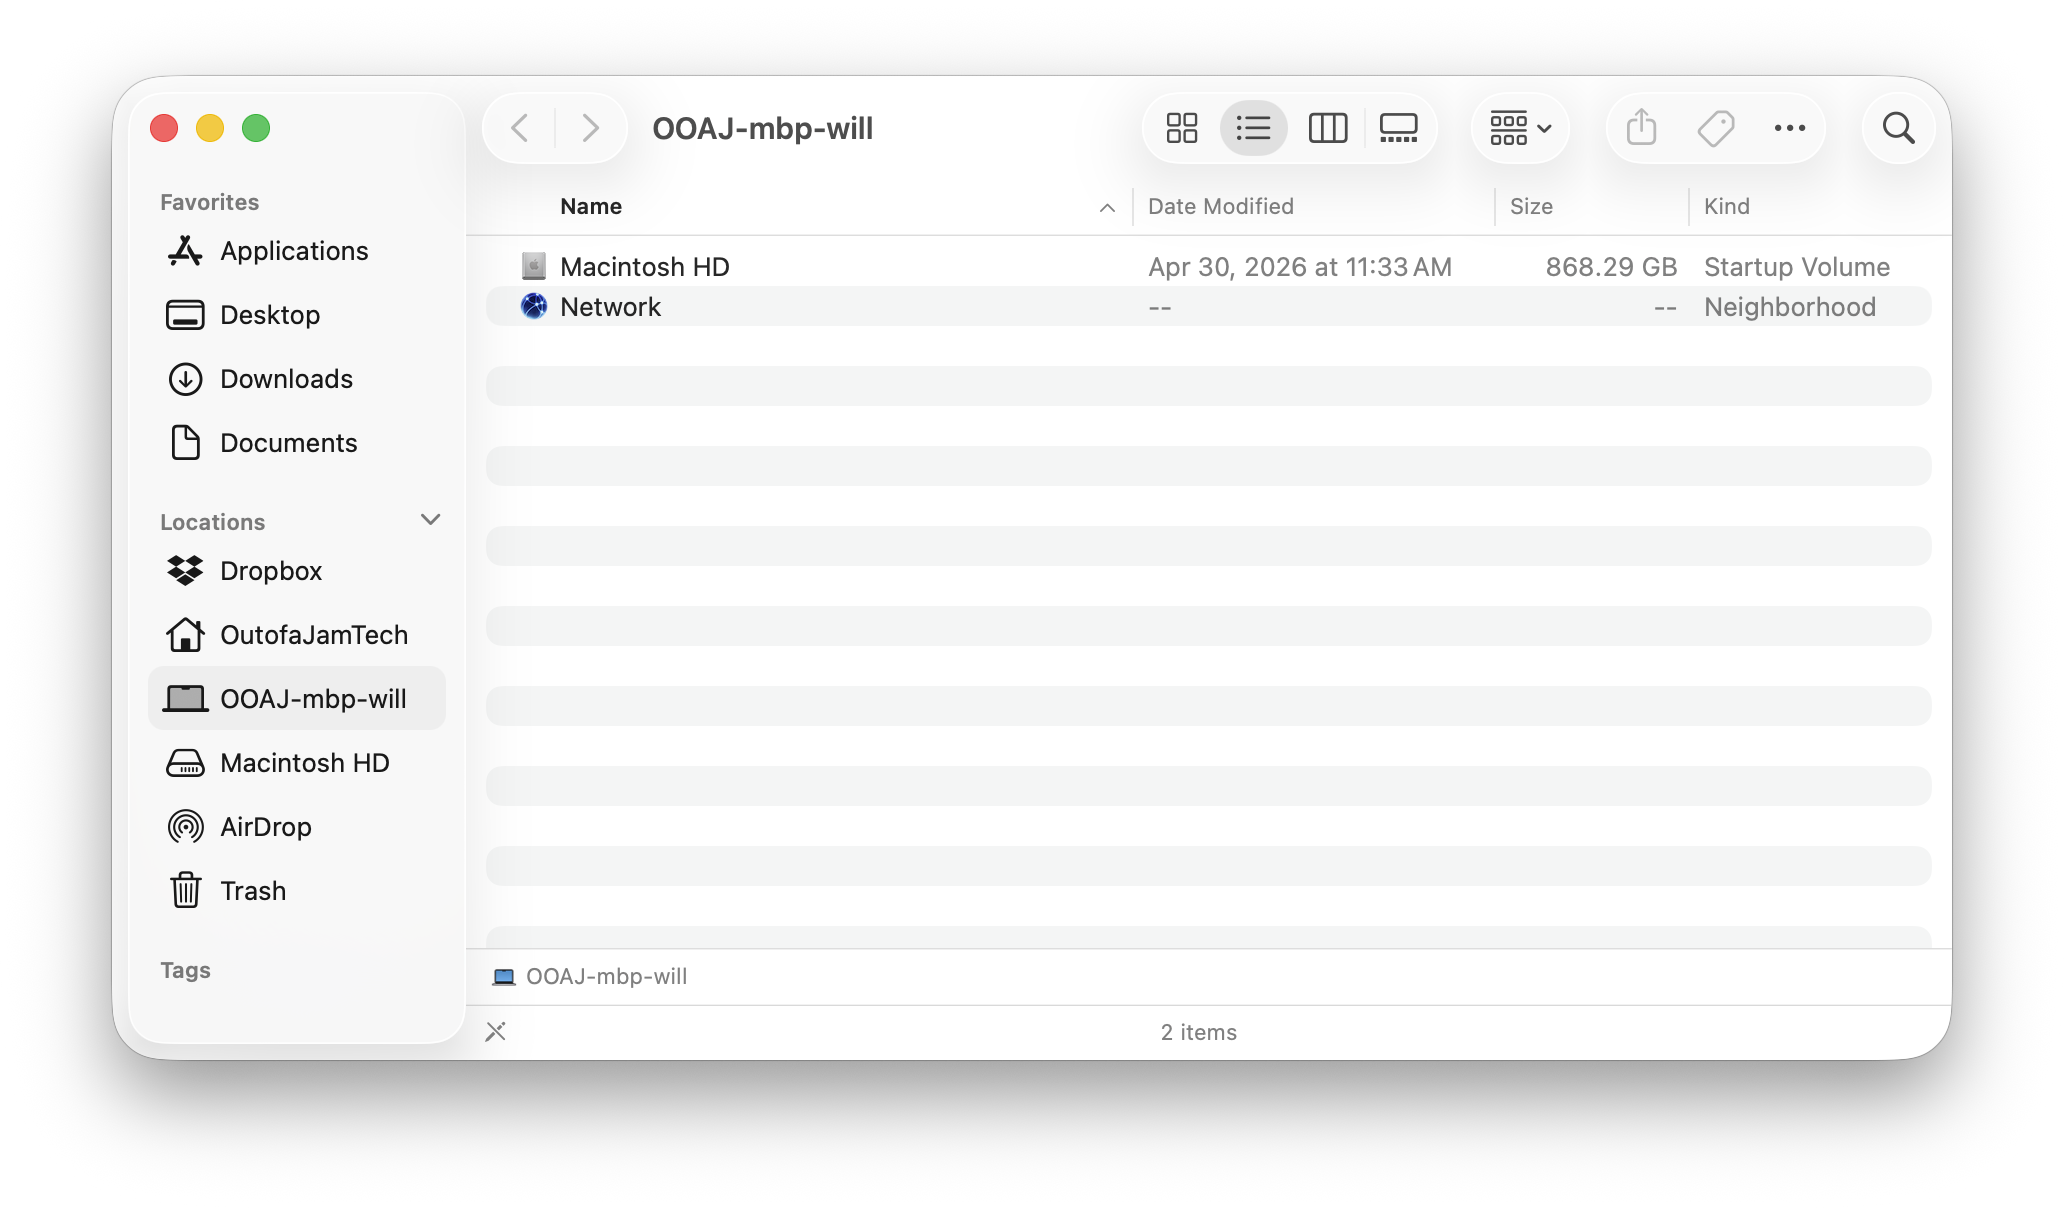
The final important step for you is to make sure you can see your Dropbox folder. Previously, you were likely used to Dropbox showing under “Favorites” in the Finder sidebar. Dropbox now shows under “Locations,” like a hard drive or network share, but only if you enable certain settings.
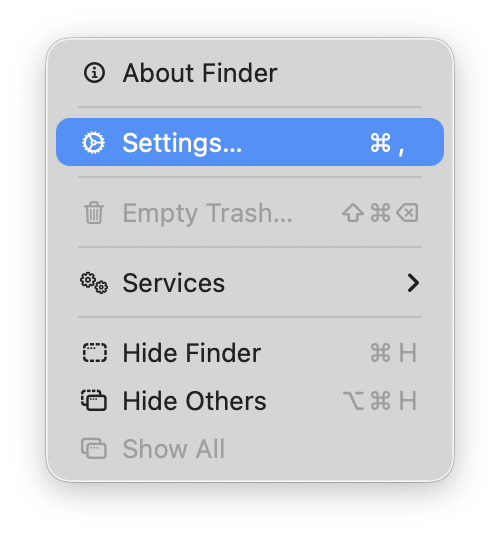
To make sure you can see Dropbox, open Finder by clicking your friendly blue and white smiley face in the Dock, or by clicking the desktop background. Then click the Finder menu next to the Apple menu in the top left corner of your screen.

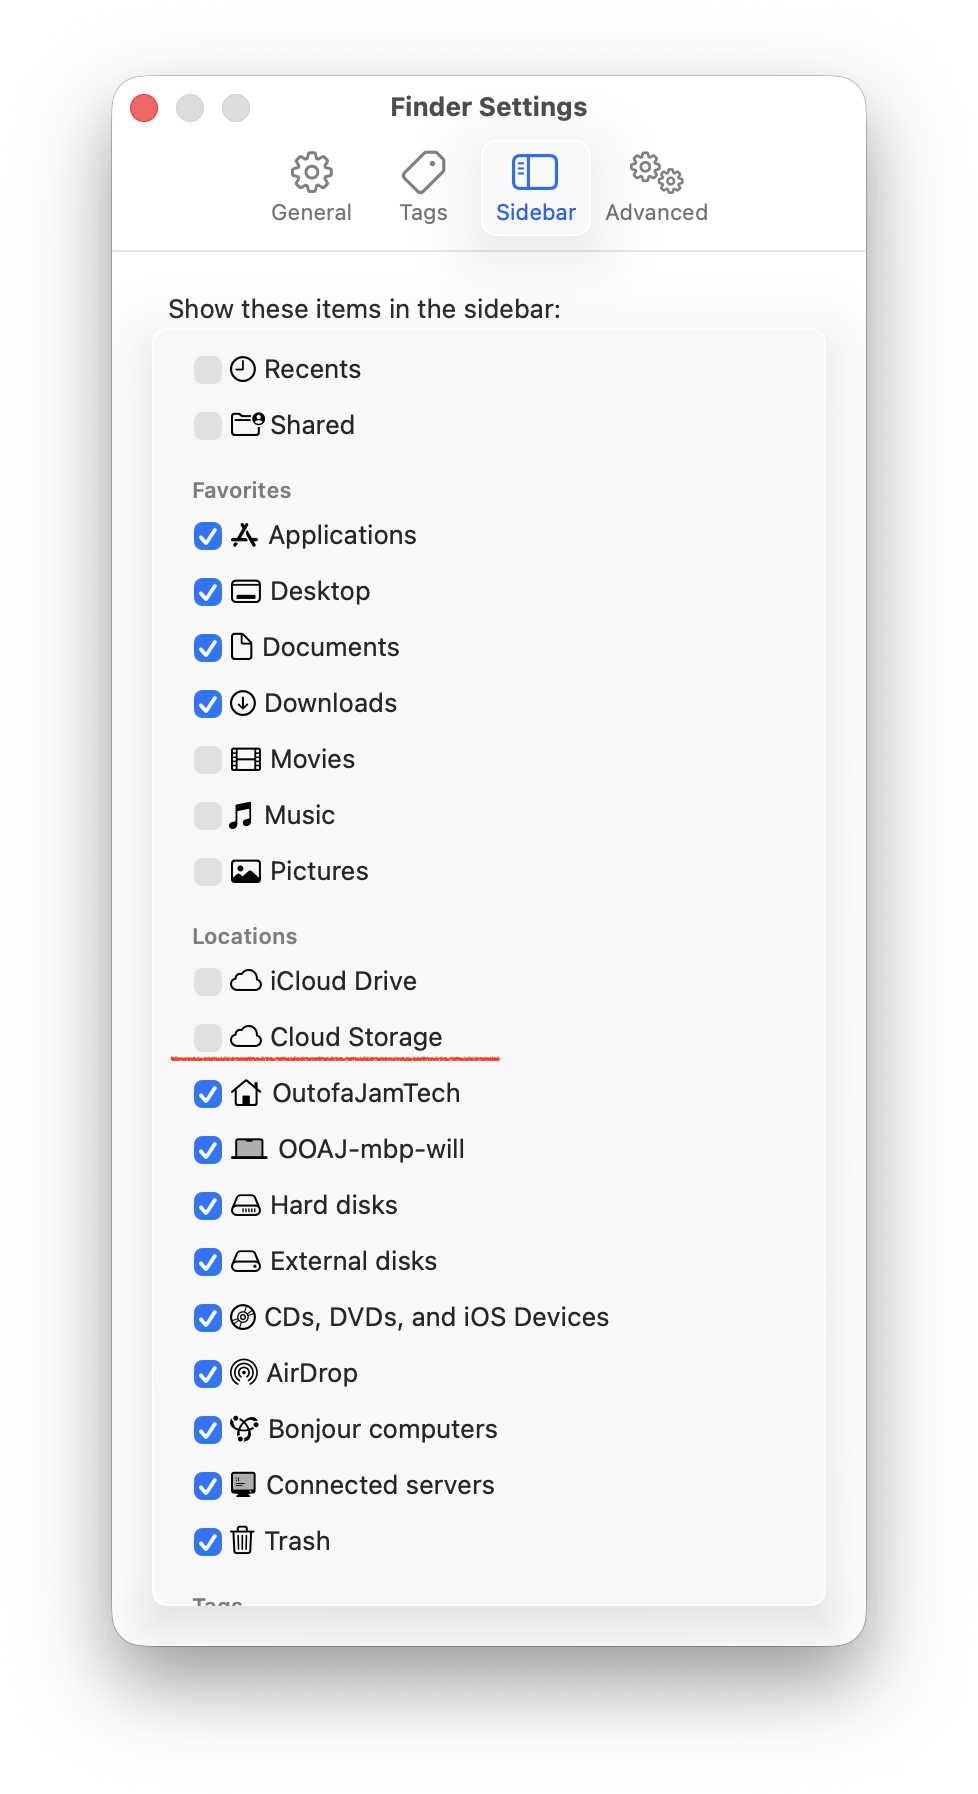
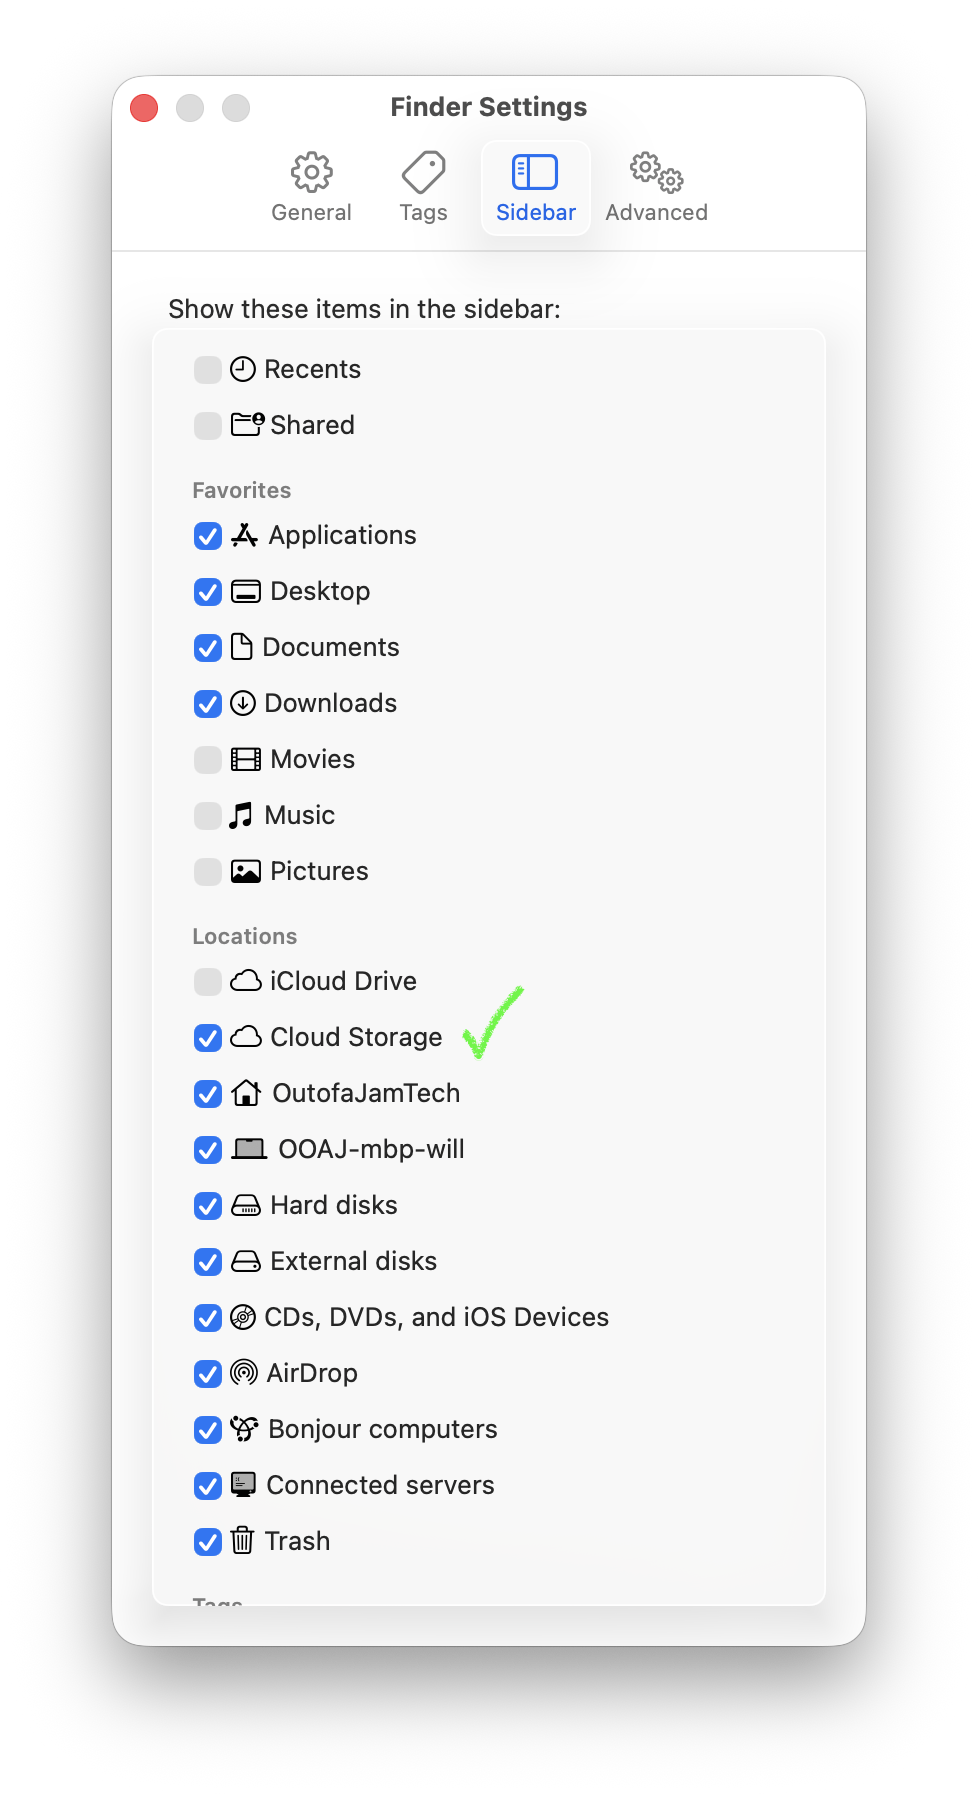
In the Finder menu, click “Settings.” Choose “Sidebar” from the top of the Settings window. Scroll down to “Locations” and make sure “Cloud Storage” (not to be confused with “iCloud Drive”) is checked. Close settings.
Open a Finder window and look at the sidebar. Make sure “Locations” is showing fully by hovering over the word. If the dropdown carrot points to the side, click it to expand its sub-menu items.
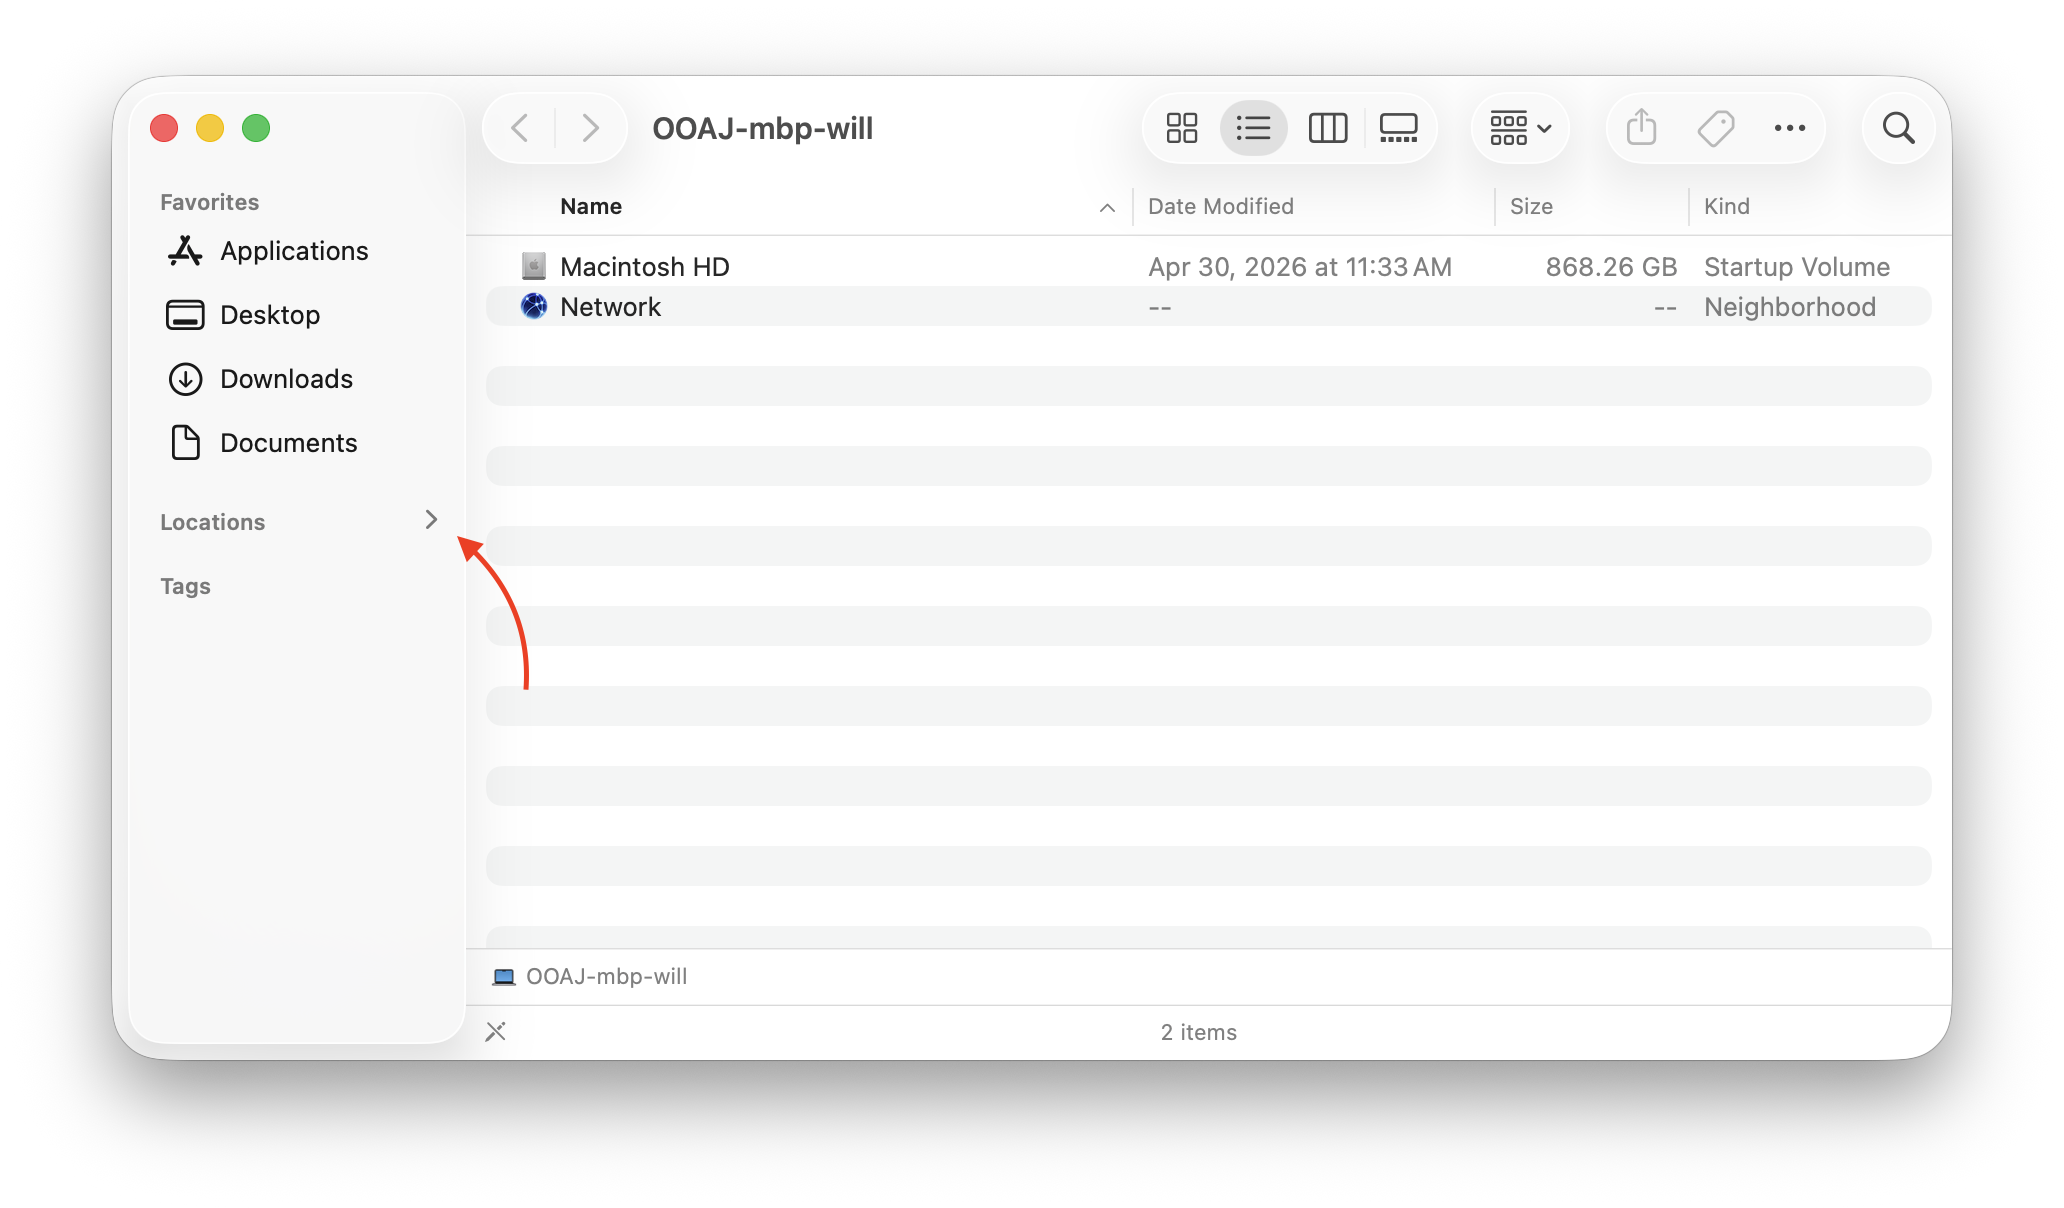
Dropbox should now appear.
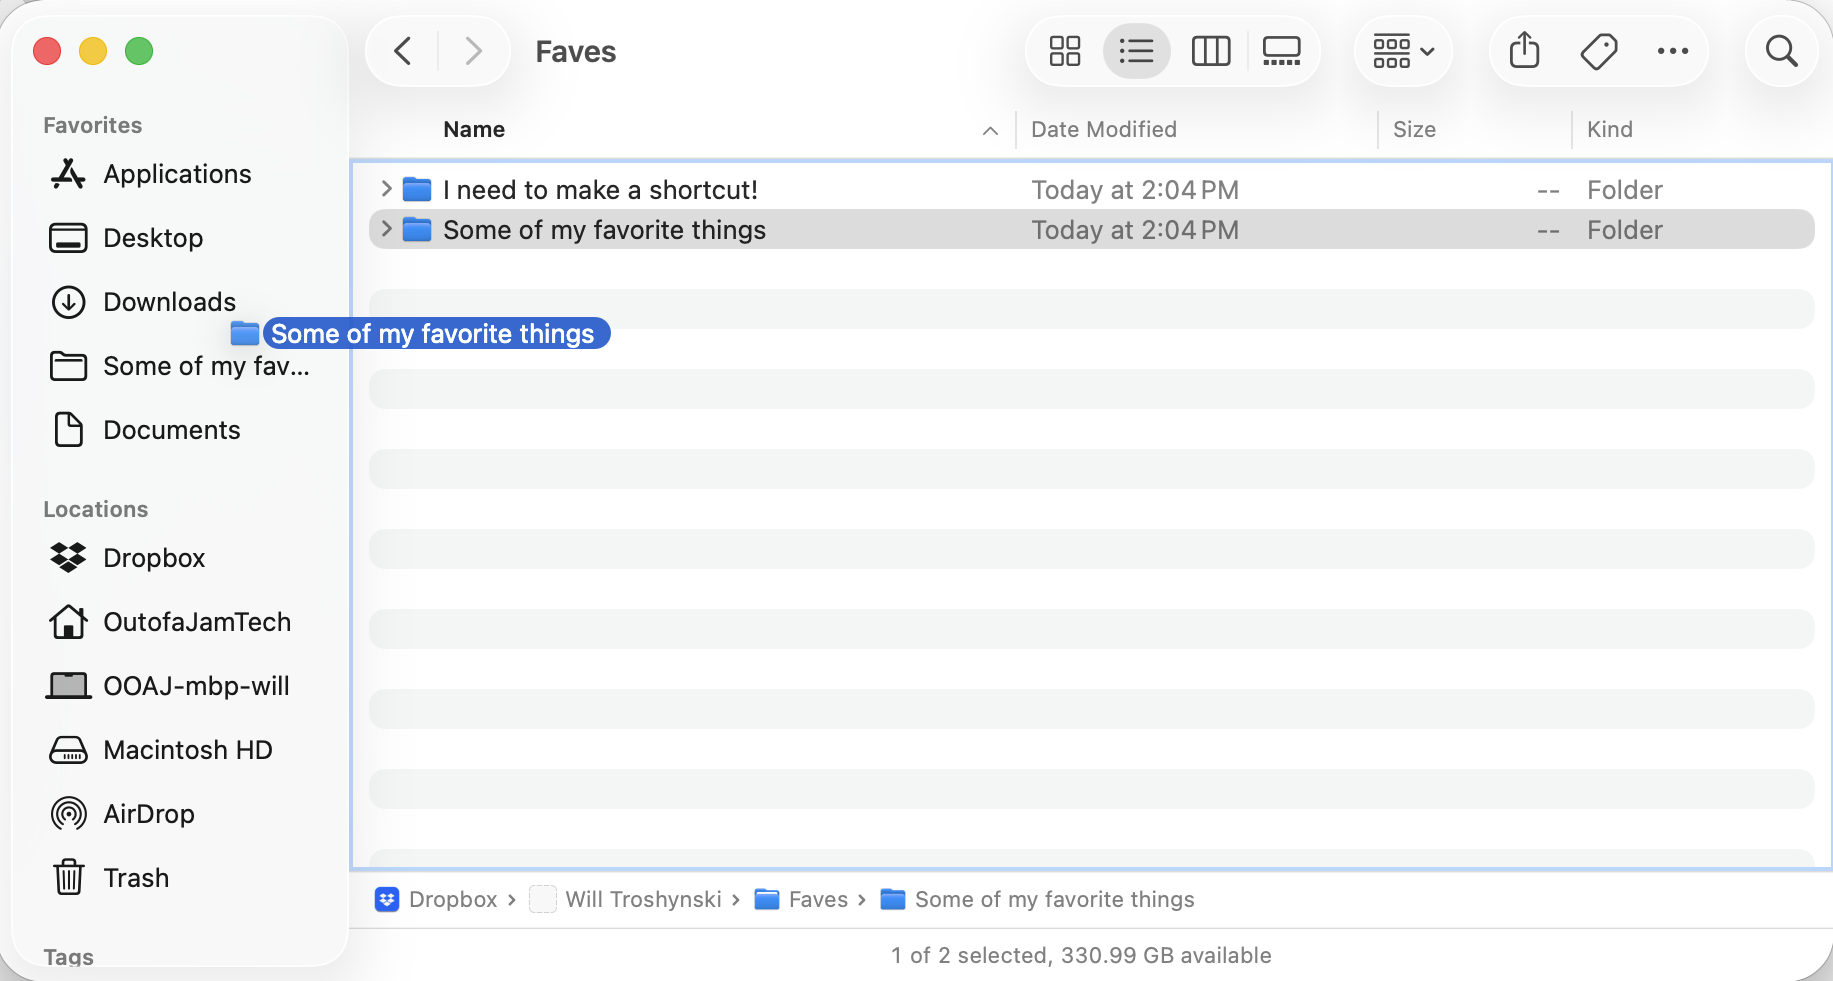
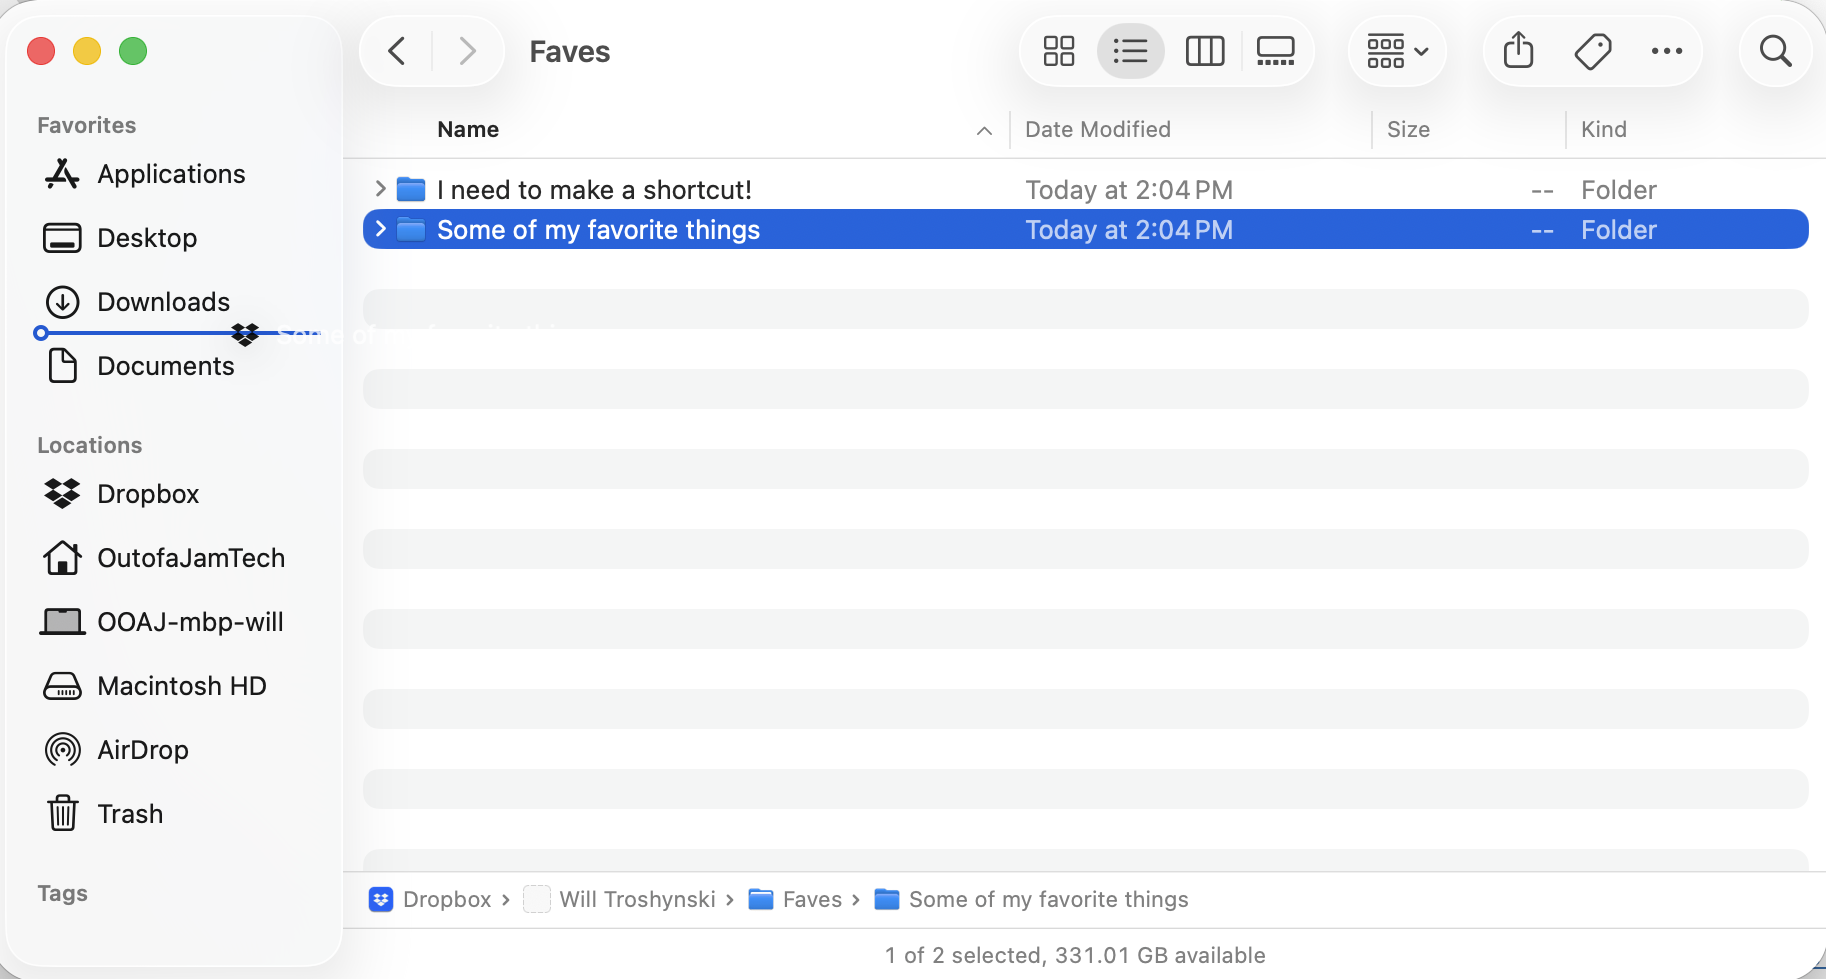
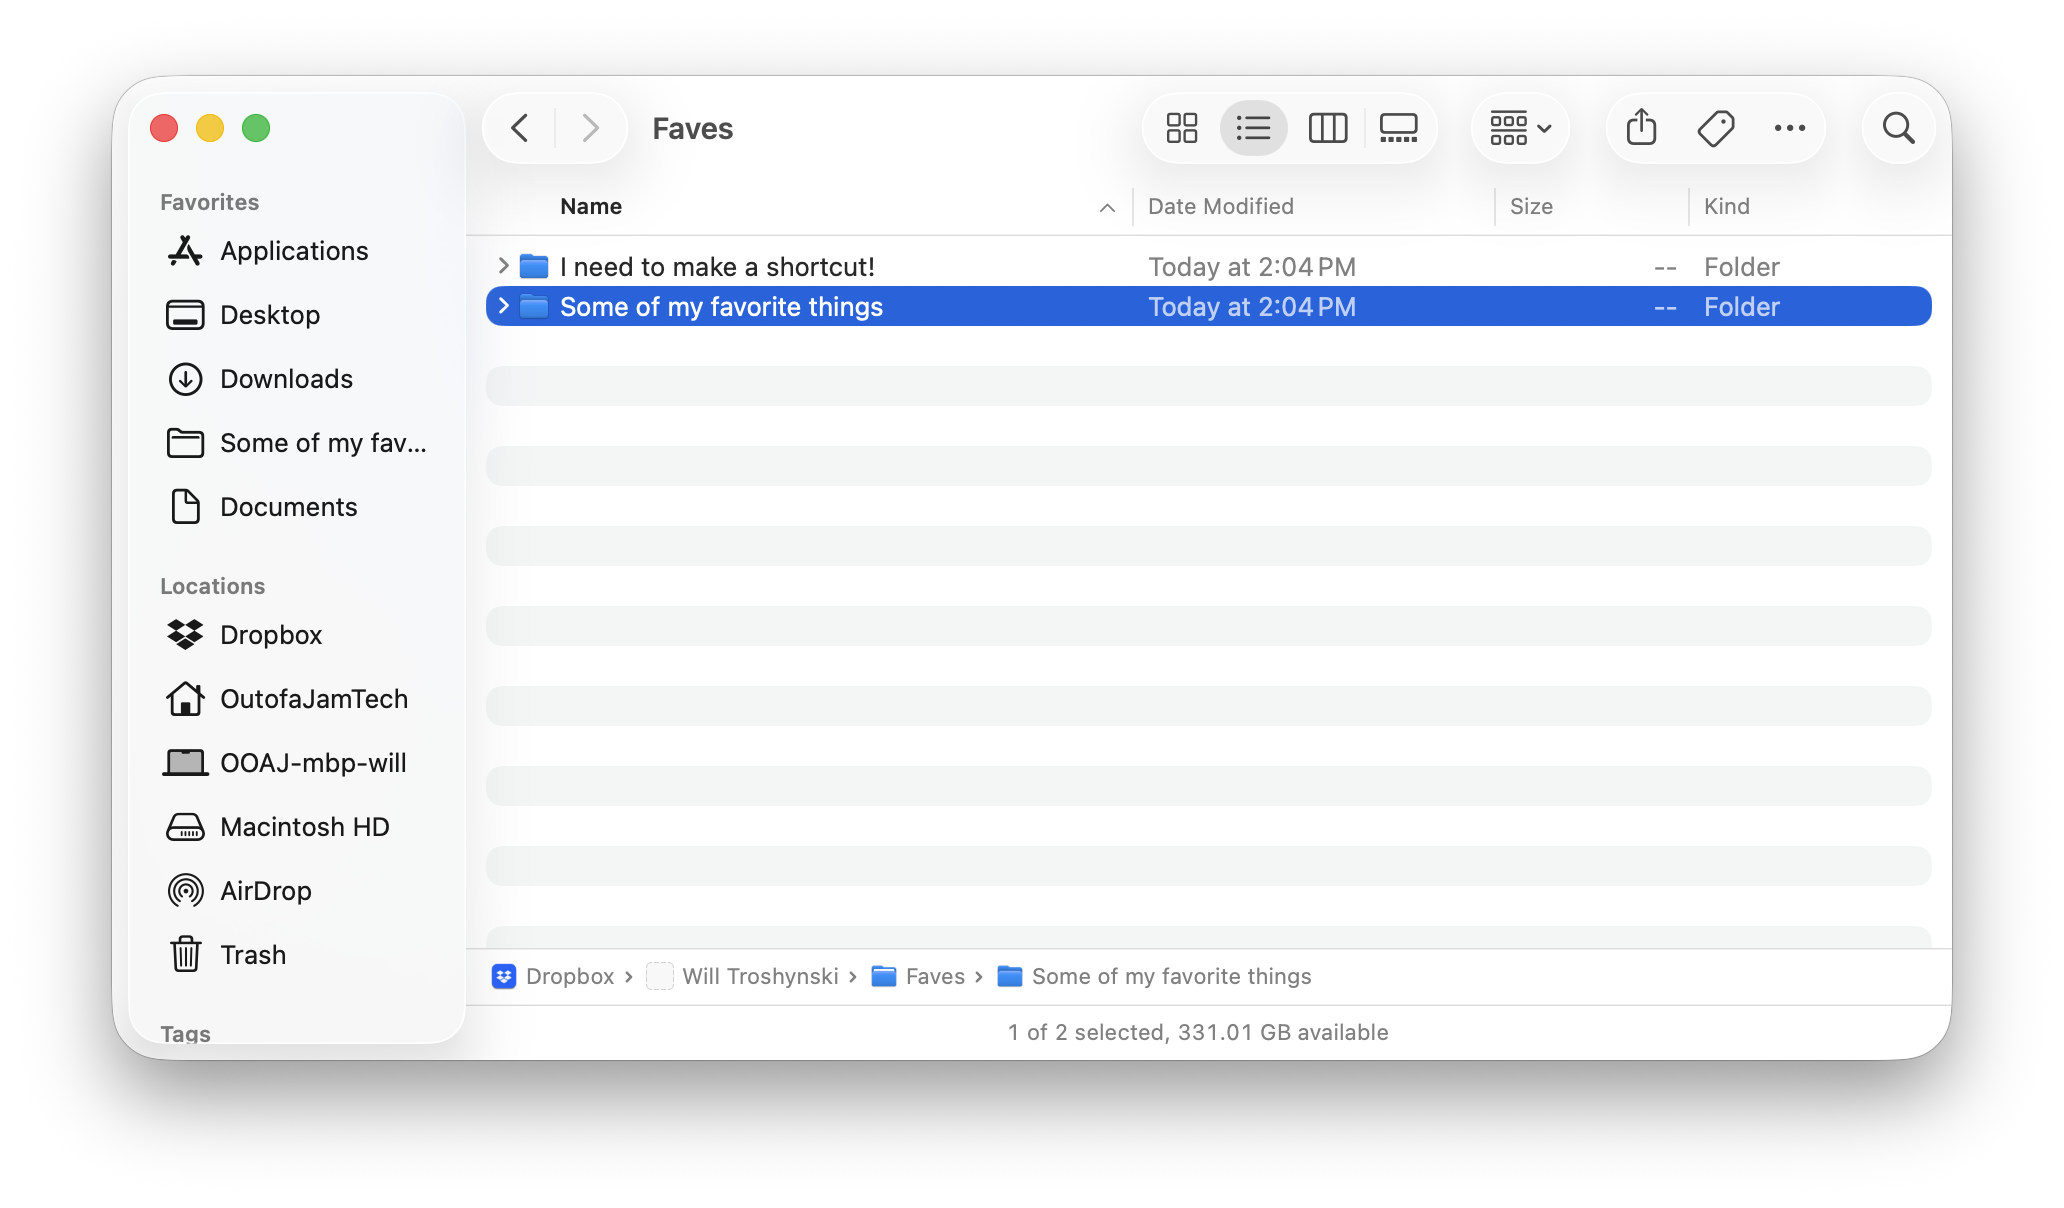
You unfortunately cannot put Dropbox into the Favorites section of the sidebar, but you can add folders within Dropbox there by dragging and dropping them when a line with a circle appears, showing you where they will “land.”
You can also move Locations up in the sidebar order by dragging it to the place you like. Instead of a line, you’ll see the other sections “scoot” up or down to make room for where you want Locations to land.
If there are sidebar items that clutter your view, you can disable them from showing the same way you just enabled Cloud Storage to appear, in Finder Settings.
You are now updated to Dropbox for File Provider!
Does Out of a Jam manage Dropbox for your organization? If so, and if anyone needs an extra hand to implement this change, they can file a ticket here.
If you’d like us to help your organization maximize what you can do with Dropbox or your macOS or iOS fleet in general, reach out to us here.